Transform Your Autodesk Workflow with Real-Time IoT Data
IOTTAG’s seamless integration with Autodesk Construction Cloud allows users to manage assets, monitor operations, and improve decision-making—all in real time. Whether you’re managing equipment, tracking carbon emissions, or monitoring safety compliance, IOTTAG brings advanced IoT capabilities directly into Autodesk’s robust project management tools.
Step 1: Authenticate Your Autodesk Account
– Start by logging in with the account provided by IOTTAG’s admin.
– Link your Autodesk account by following the simple prompts.
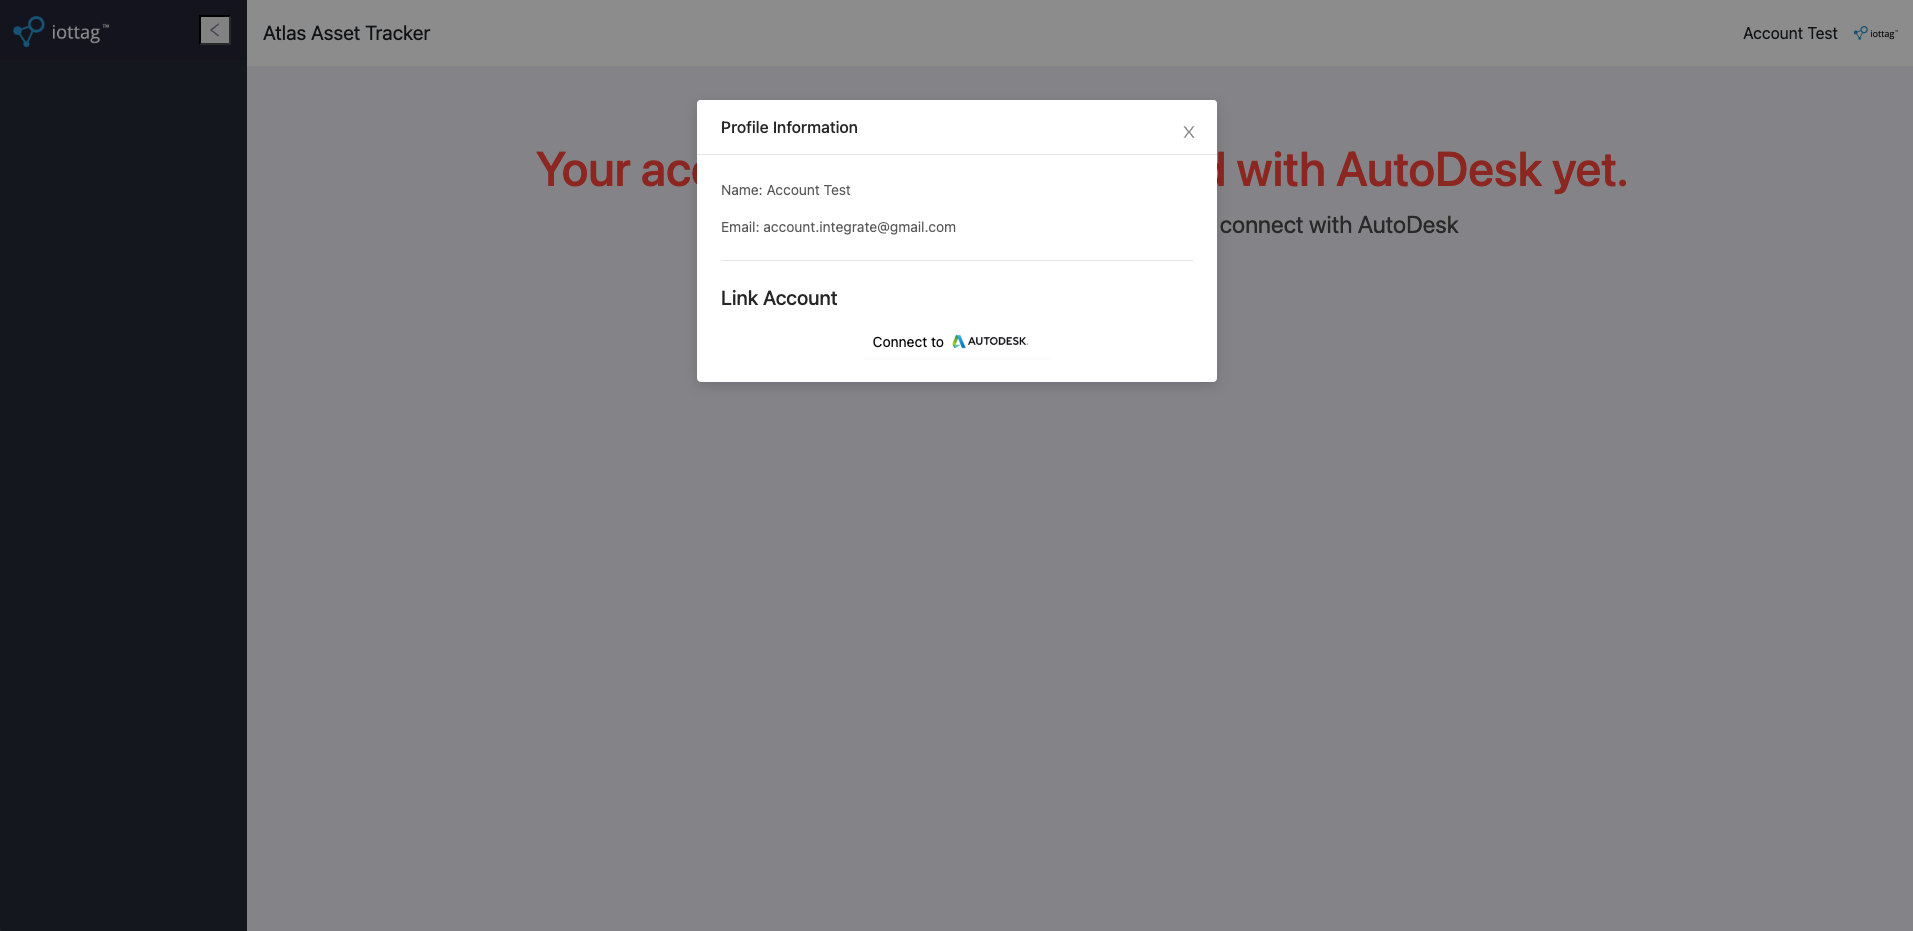
– After successfully linking, you’ll be redirected to the Home Page, where you can begin managing your equipment.
Step 2: Attach an Atlas Tag to Autodesk Equipment
Pre Conditions:
– Ensure your company has at least one project on the Autodesk platform.
– Ensure that company has at least one piece of asset on the Autodesk platform.
– You need at least one tag or gps created in the Atlas platform that is not yet attached to any asset.
Instruction:
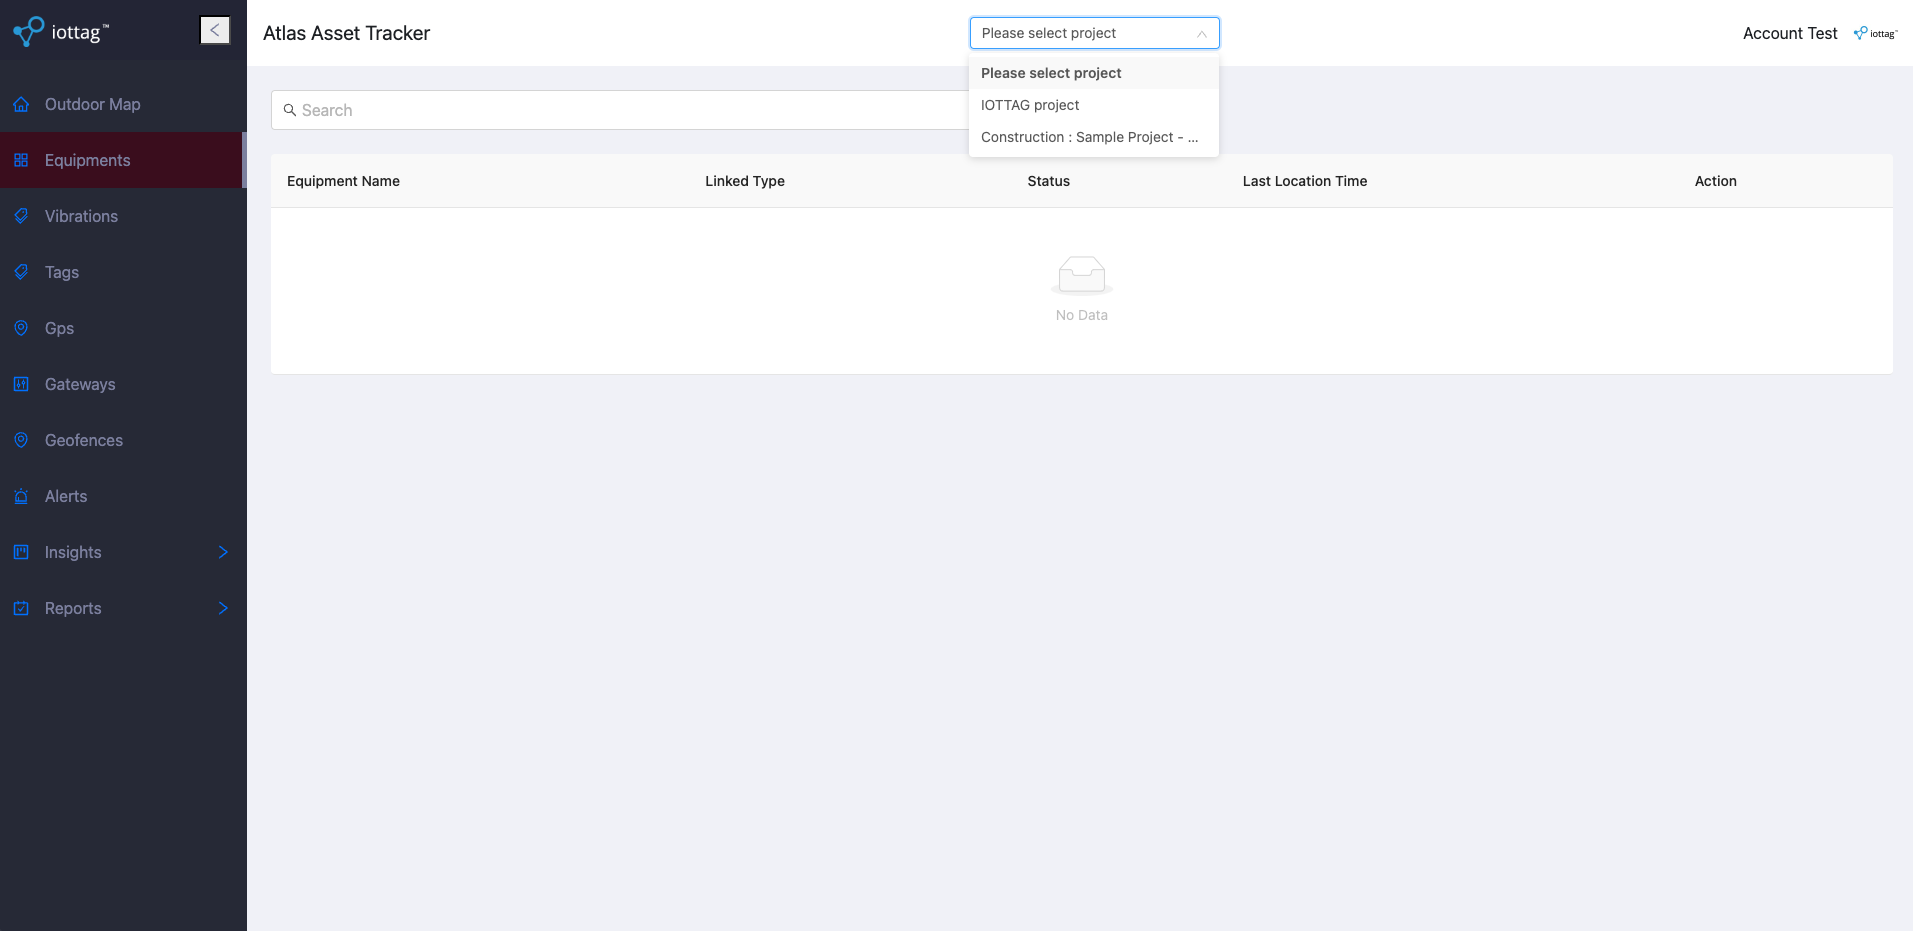
– Navigate to Equipment Management Page
– Select the project you want to work with.
– Select the asset you want to attach the tag or gps to, click the Attach button, and choose the relevant one.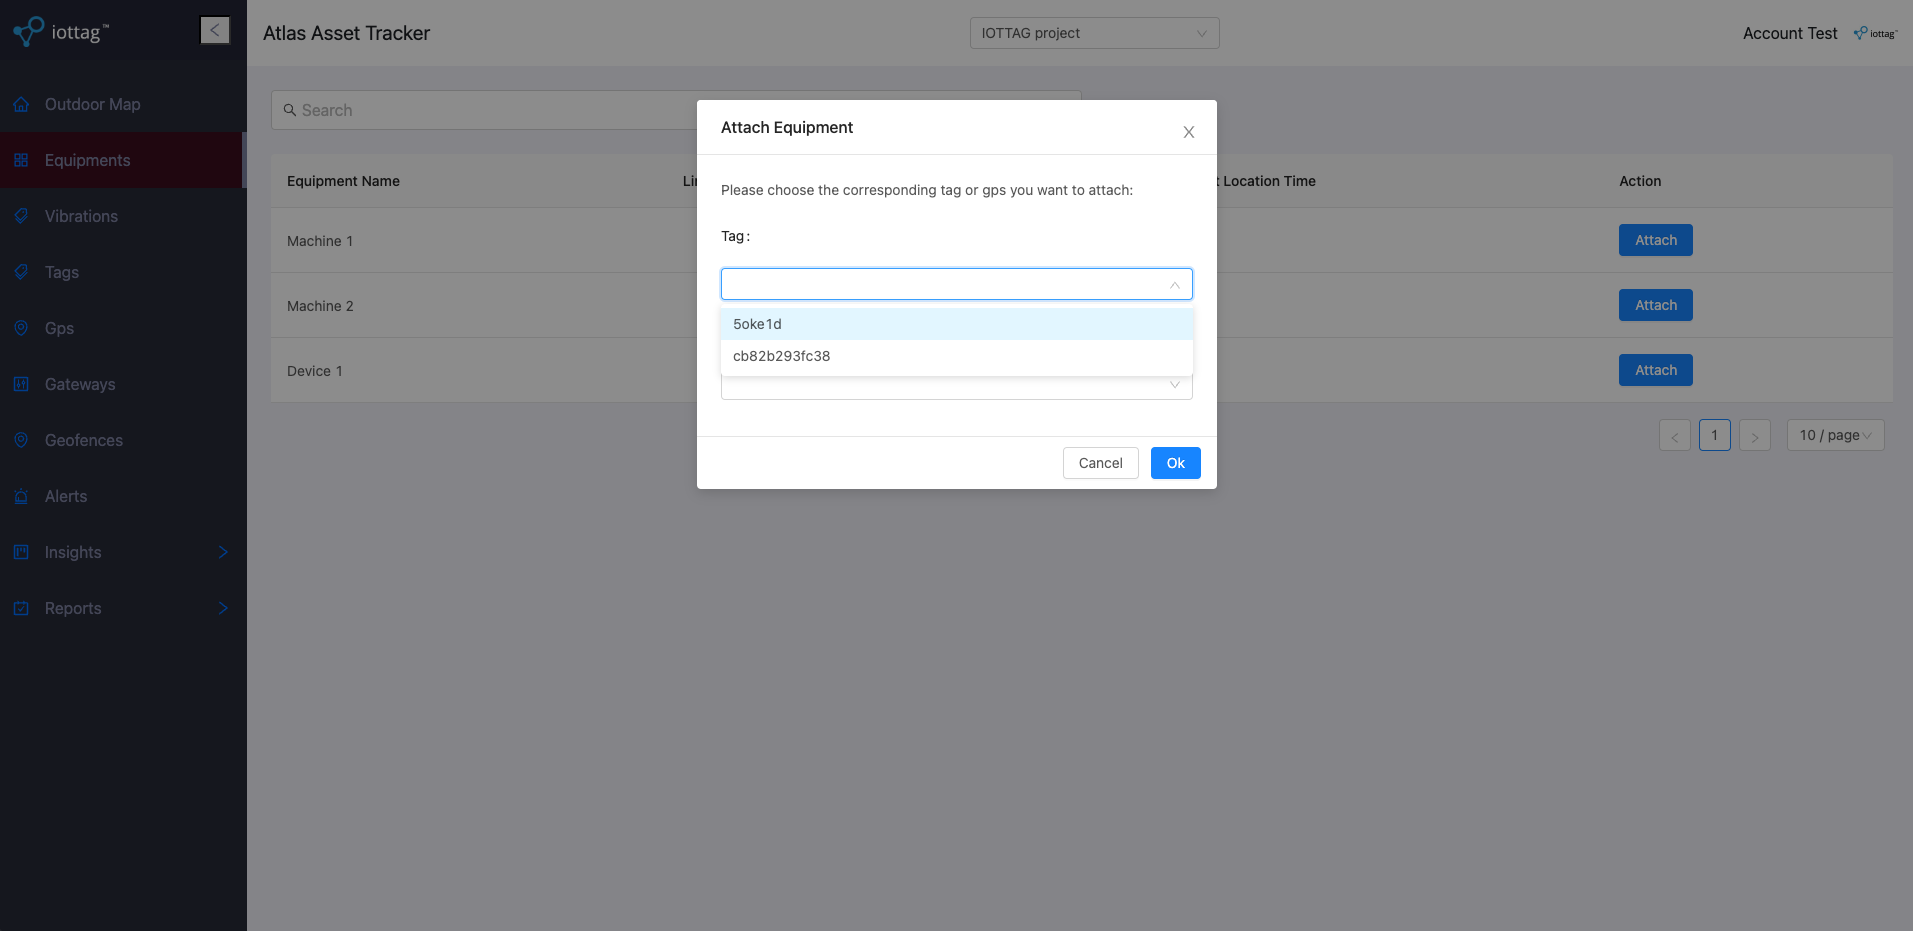

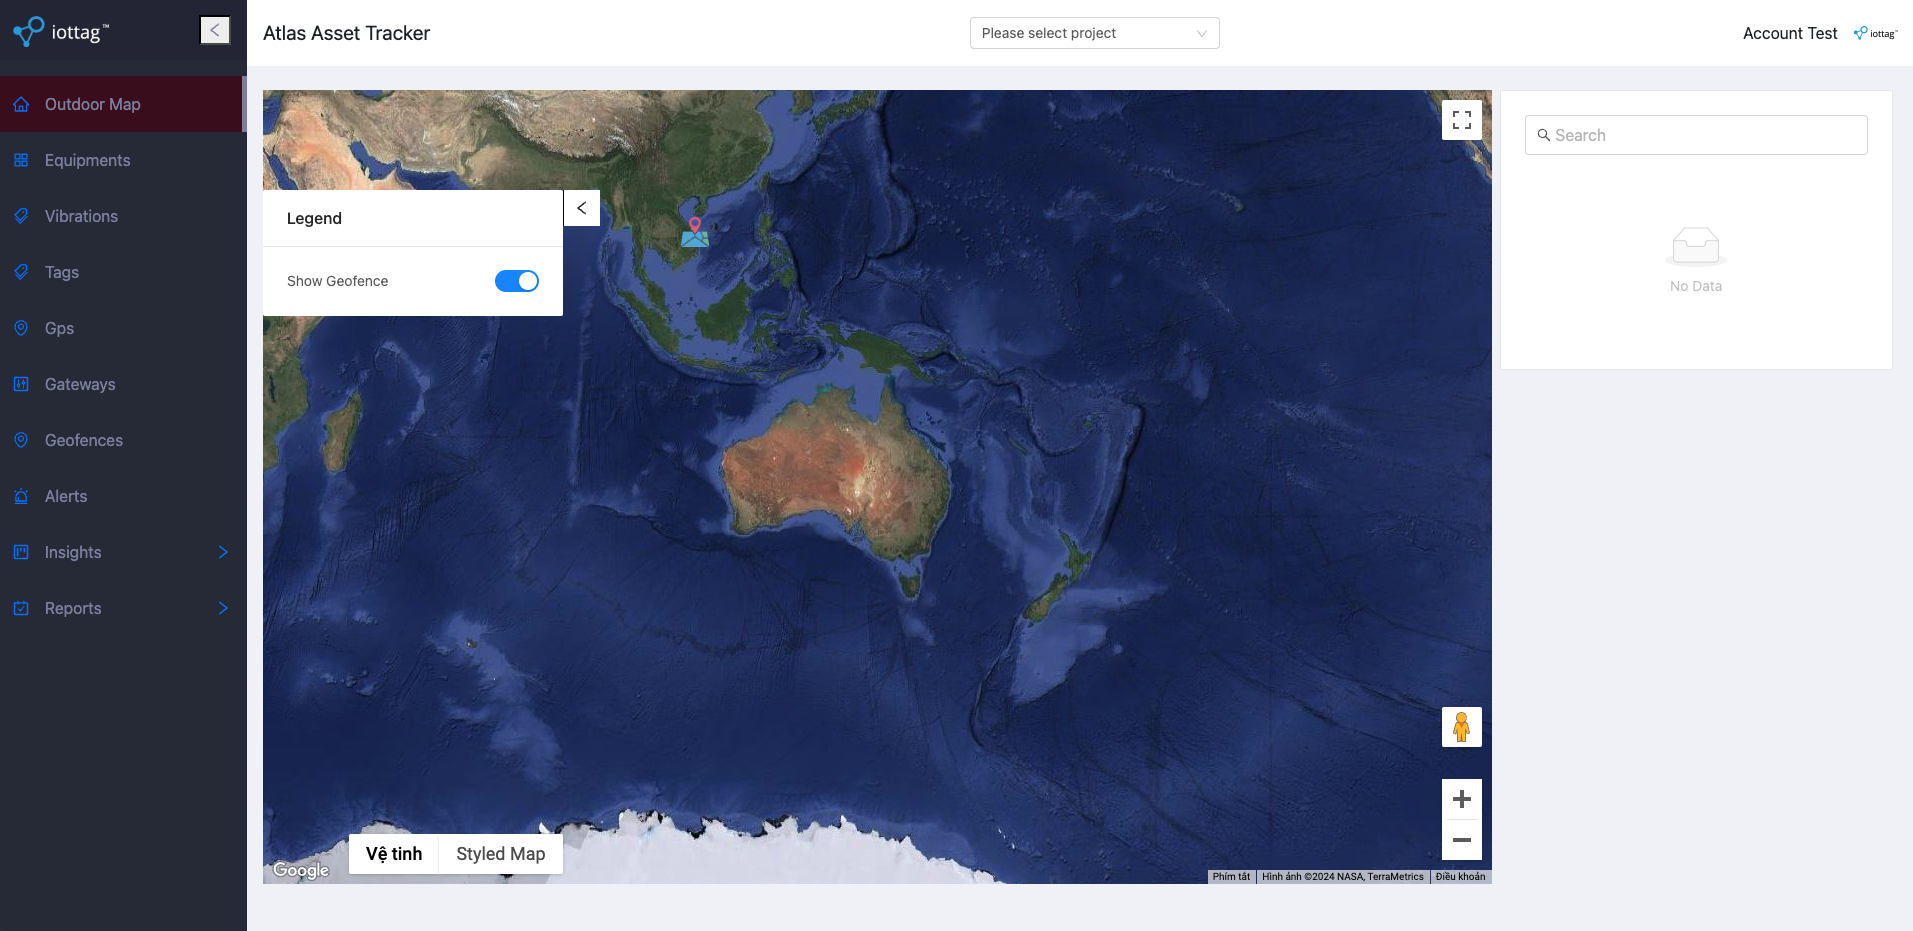
– Once attached, you can track the equipment’s location in real-time on the Outdoor Map Page.
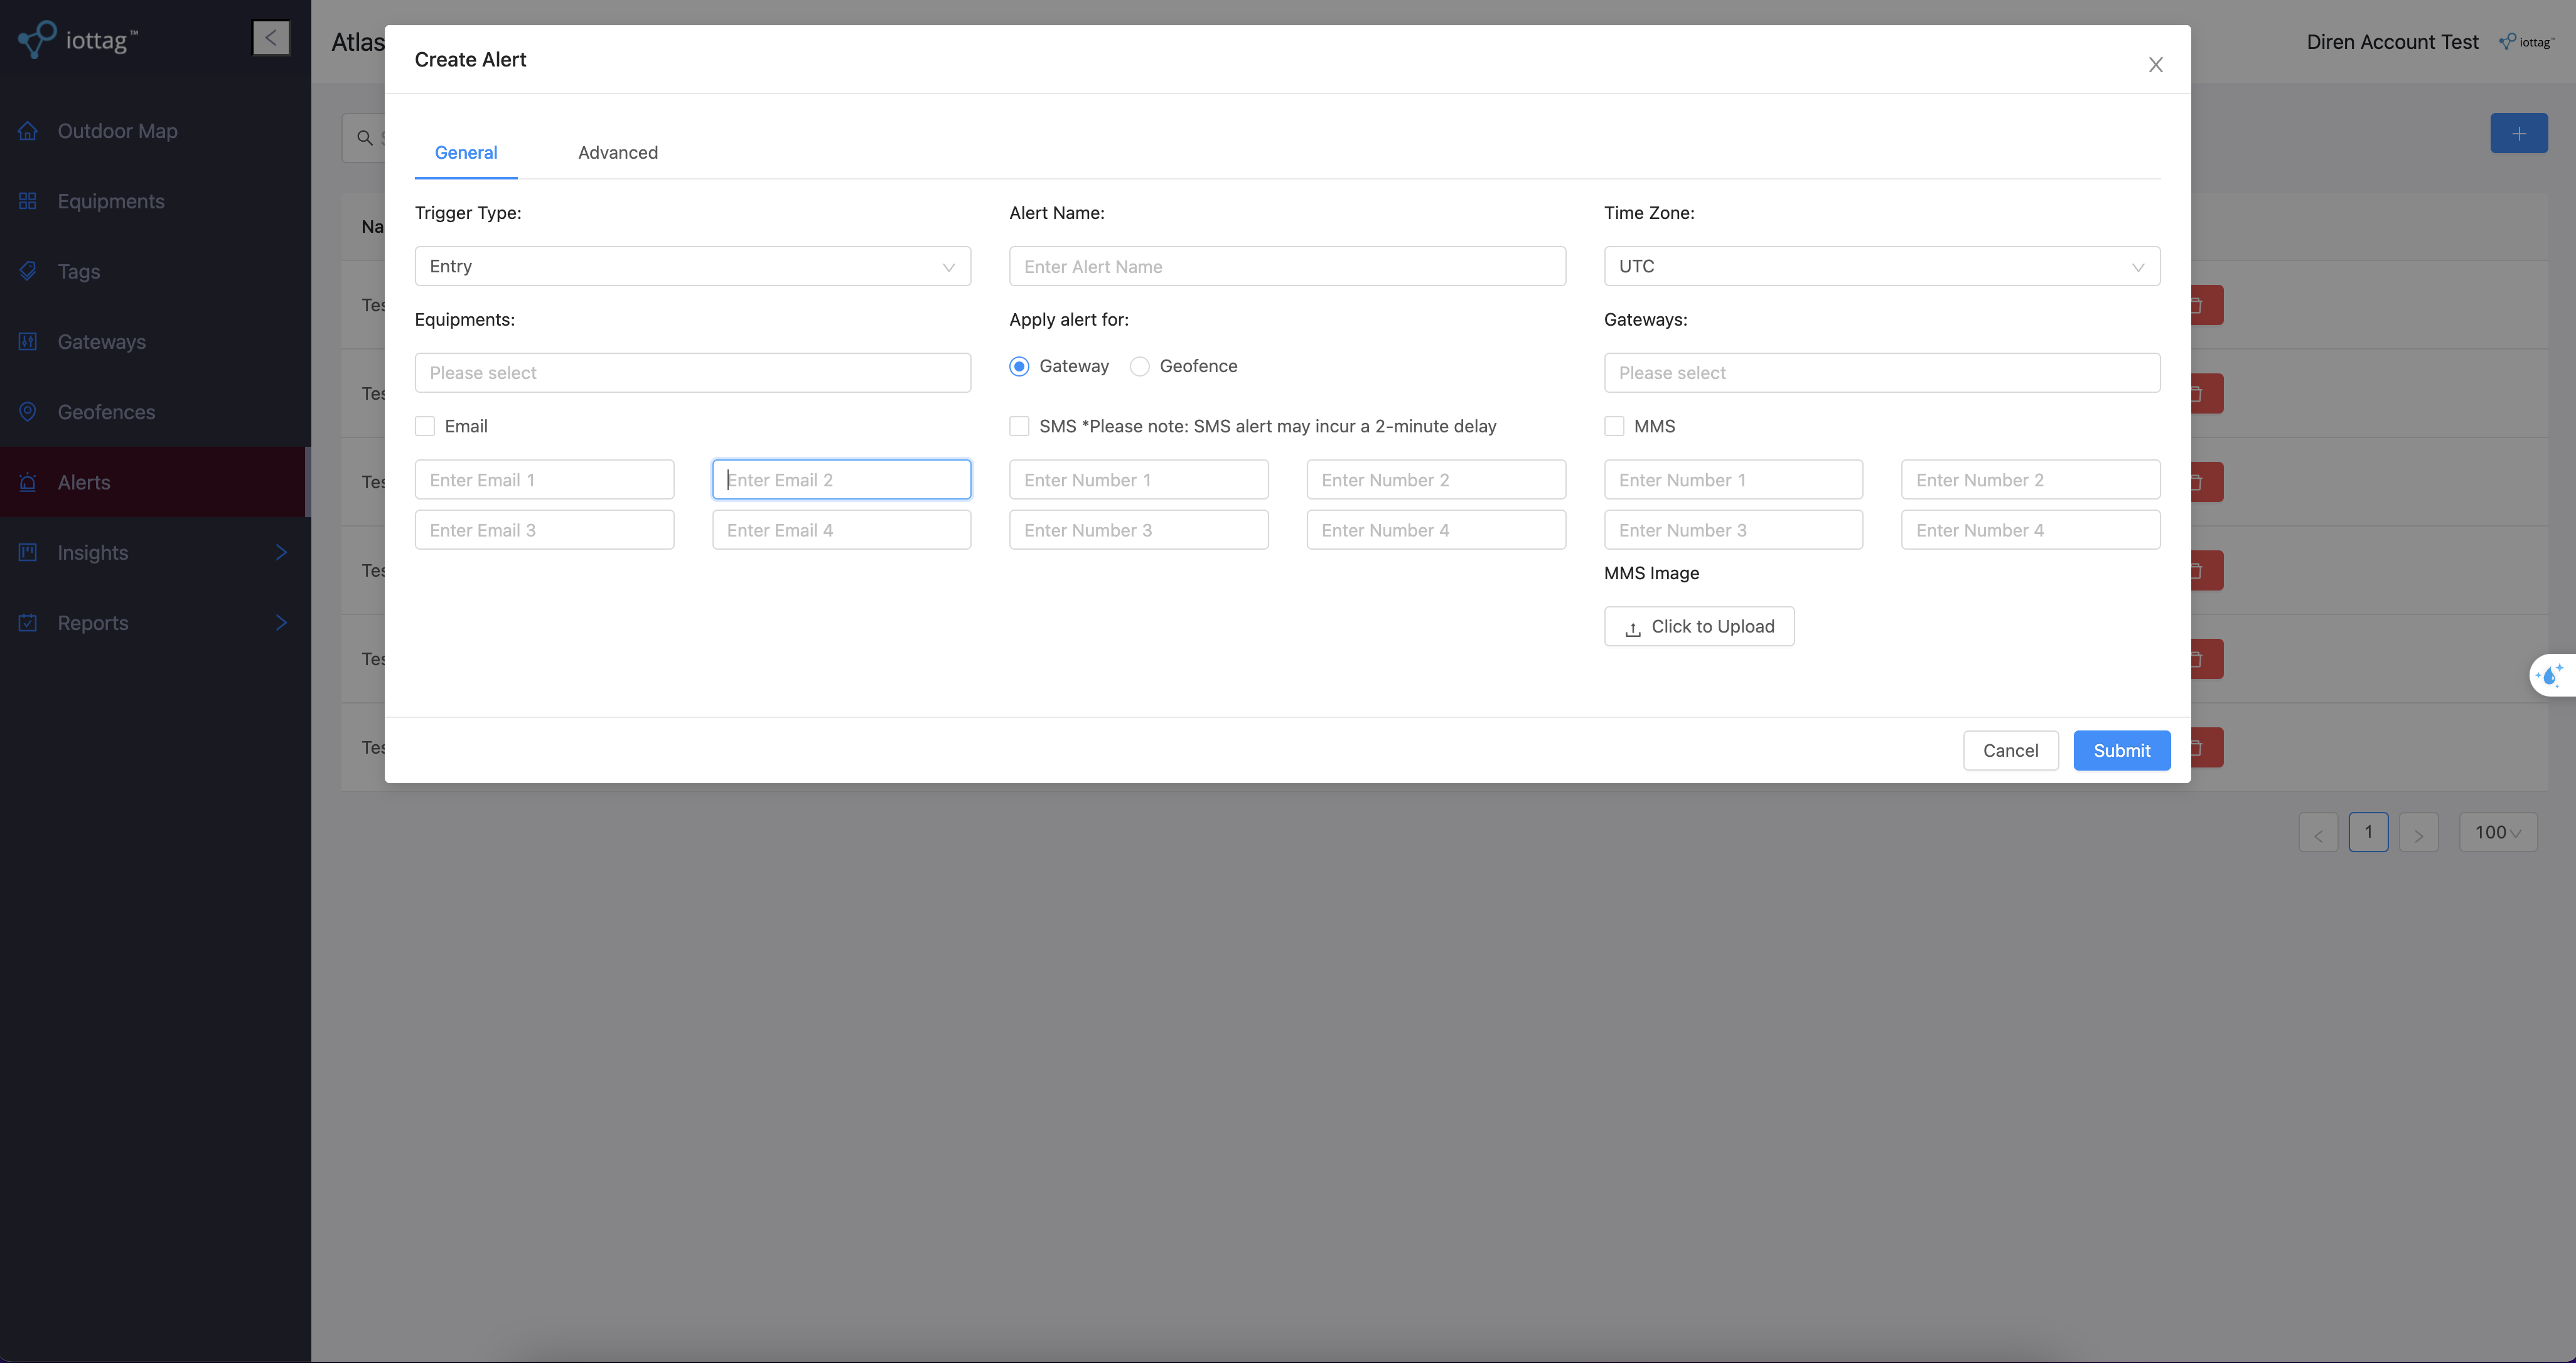
Step 3: Create Alerts to Manage Equipment Location
Pre Conditions:
– Ensure at least one gateway has been created in the Atlas platform.
Instruction:
– Navigate to Alert Management Page
– Click the Create icon, then select the corresponding equipment, gateway or geofence.
– Set your desired alert parameters, and you’ll receive a notification at the specified address when the trigger condition is met.
Outdoor Map
Main features
- Overview of equipment locations on the map
- See the exact location of each device
- Sidebar: Show equipment list and search bar
- Nothing: This equipment already updated location.
- This equipment hasn’t been updated location yet!
- This equipment hasn’t been assigned yet!
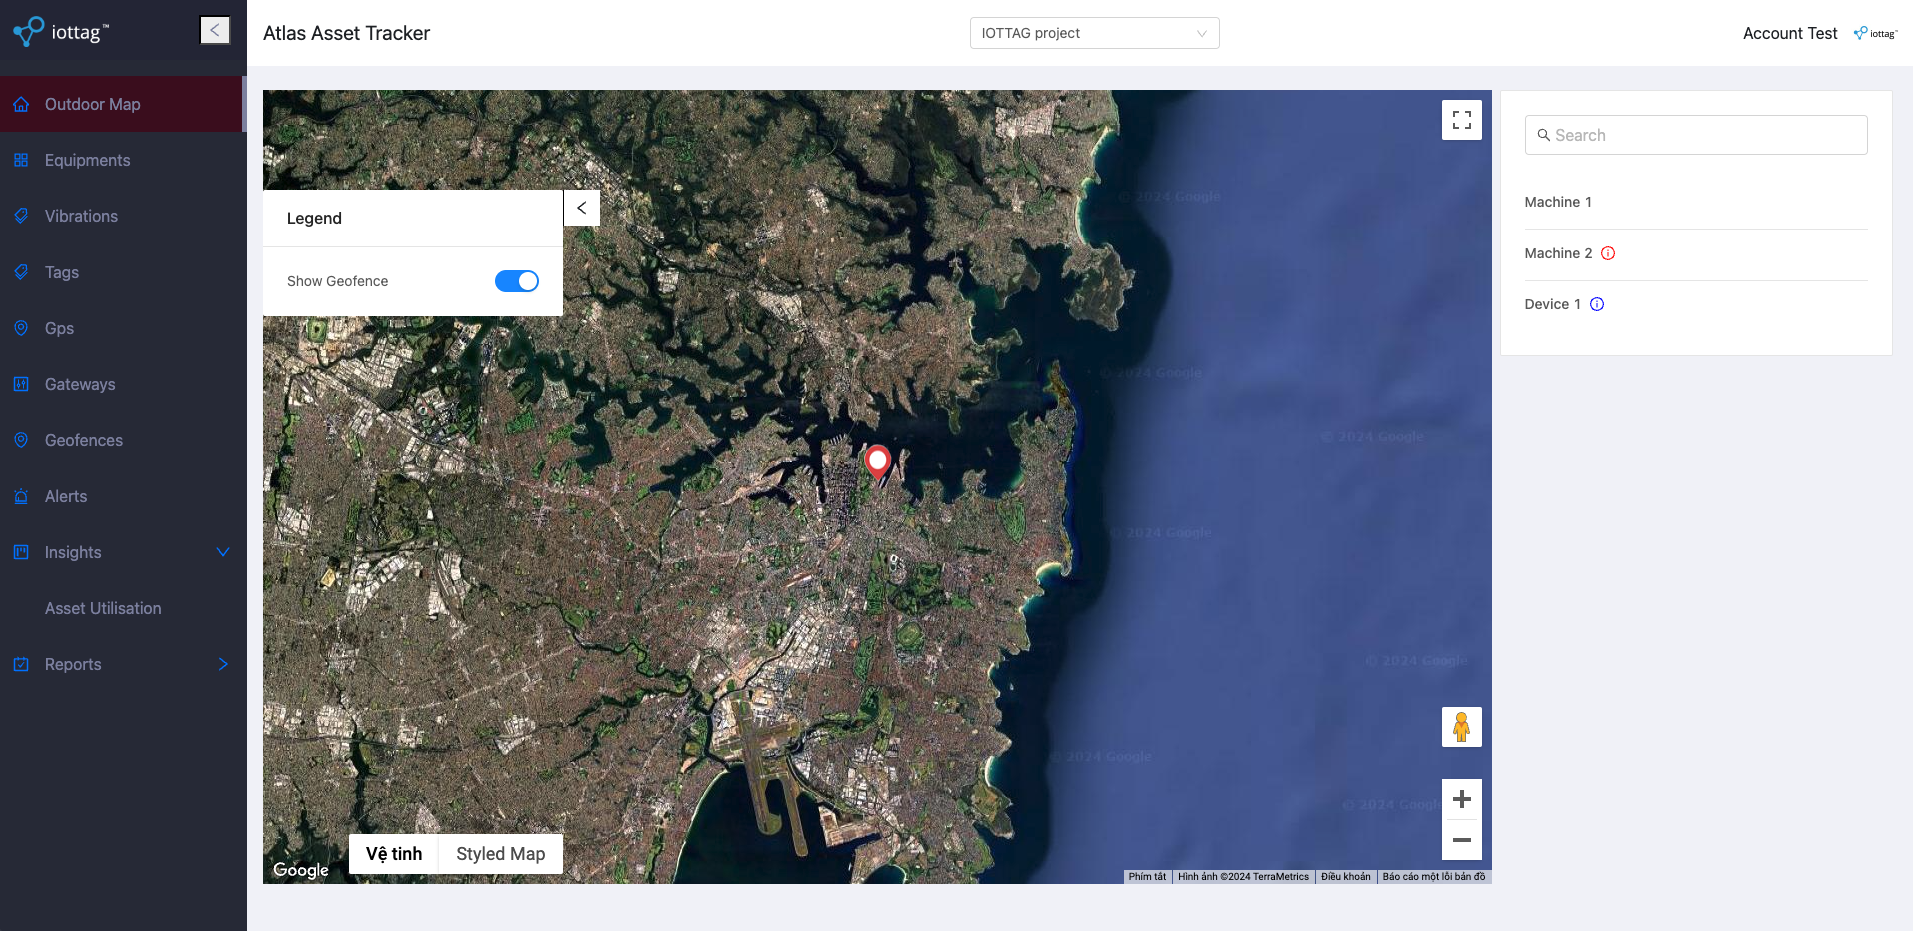
- Sidebar: Show equipment list and search bar
- Map: Show equipments on map
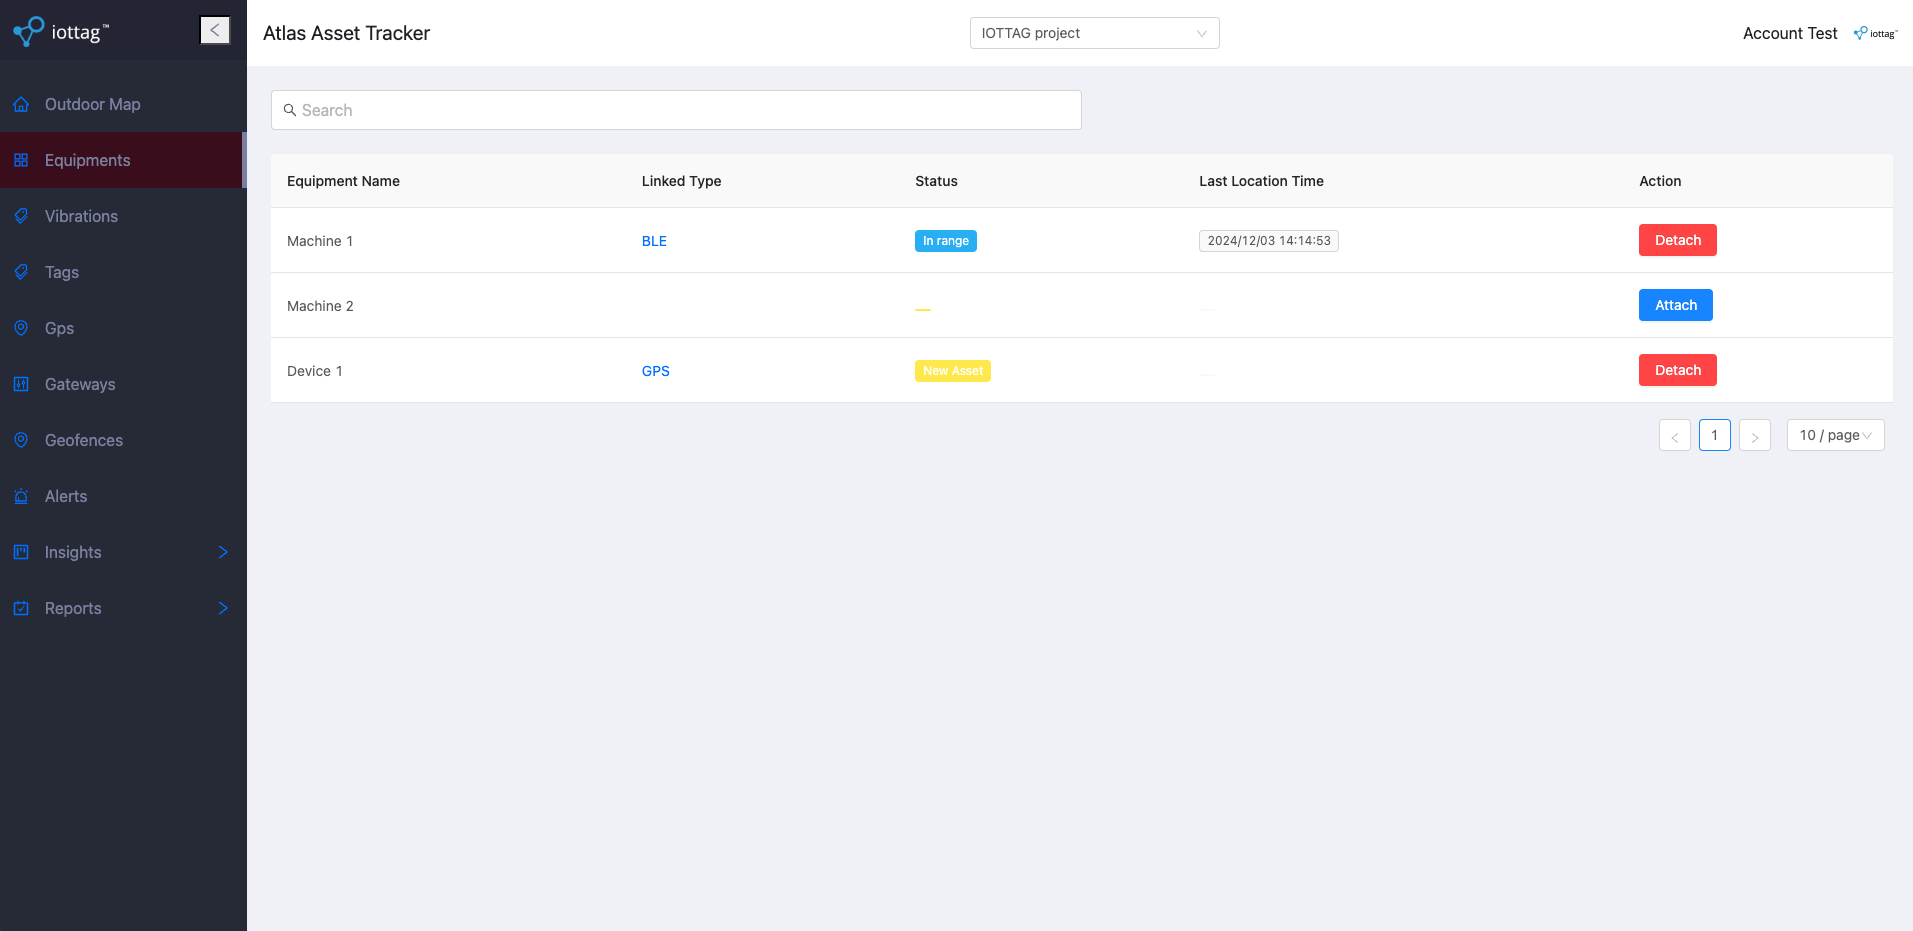
Equipment Management
Main features
- Display equipment list and current status
- Attach and detach equipment
Details
- Table
- Columns in table:
- Equipment Name: This is name of equipment in Procore platform.
- Serial: This is serial of equipment in Procore platform.
- Linked Type: There are 2 type of equipment: BLE, GPS.
- Status: This is status of tag is attacted. There are 3 status of equipment:


- Last Location Time: This last detected time of tag is attachted.
- Columns in table:
- Attach and Detach equipment
- Attach
- Click on Attach button on equipment which haven’t attached yet.
- Choose the tag that you want to attach.
- Detach
- Click on Detach button on equipment was attached.
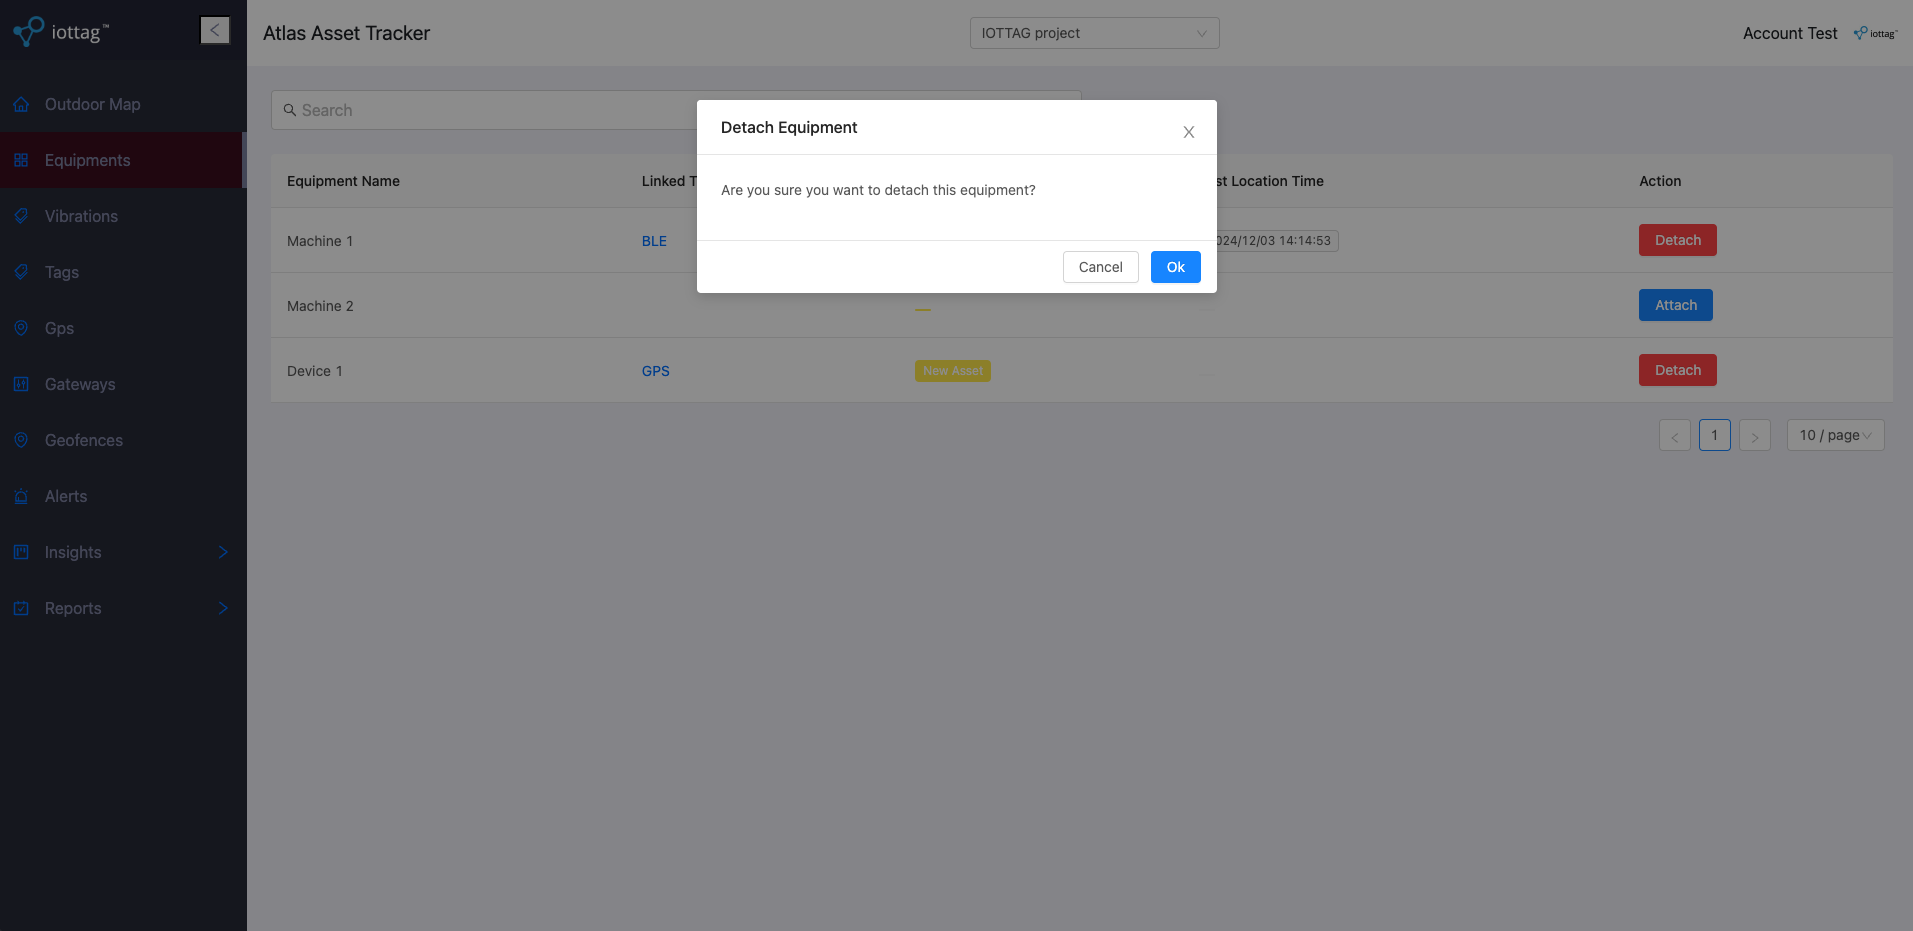
- Click on Detach button on equipment was attached.
- Attach
- Table
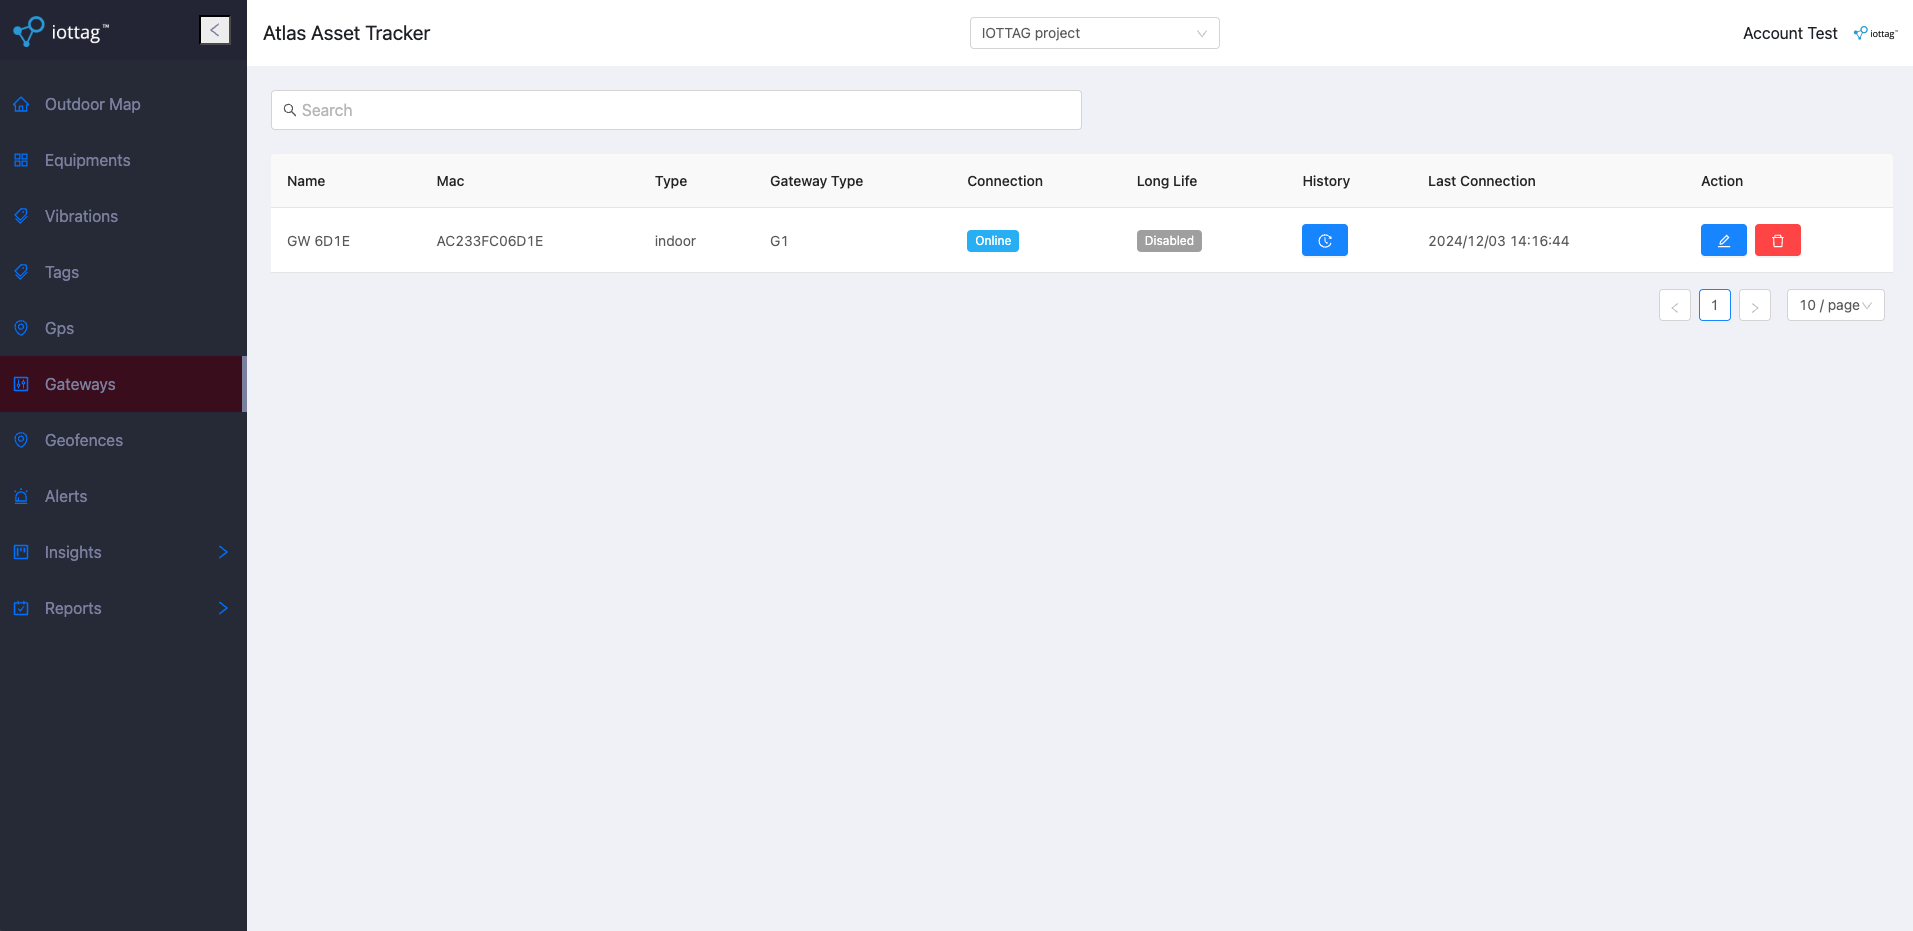
Gateway Management
Main features
- Display gateway list and current status
- Edit and delete gateway
- View gateway history
Details
- Table
- Columns in table:
- Name: This is name of gateway.
- Mac: This is mac address of gateway.
- Type: This is type of gateway. There are 2 types is outdoor and indoor. It indicates your gateway is used in outdoor or indoor.
- Gateway Type: This is category that this gateway belongs to.
- Connection: This is status of gateway. There are 2 status of gateway:


- Long Life: It indicates that this gateway is long life gateway or not.


- Last Connection: This last detected time of gateway.
- Columns in table:
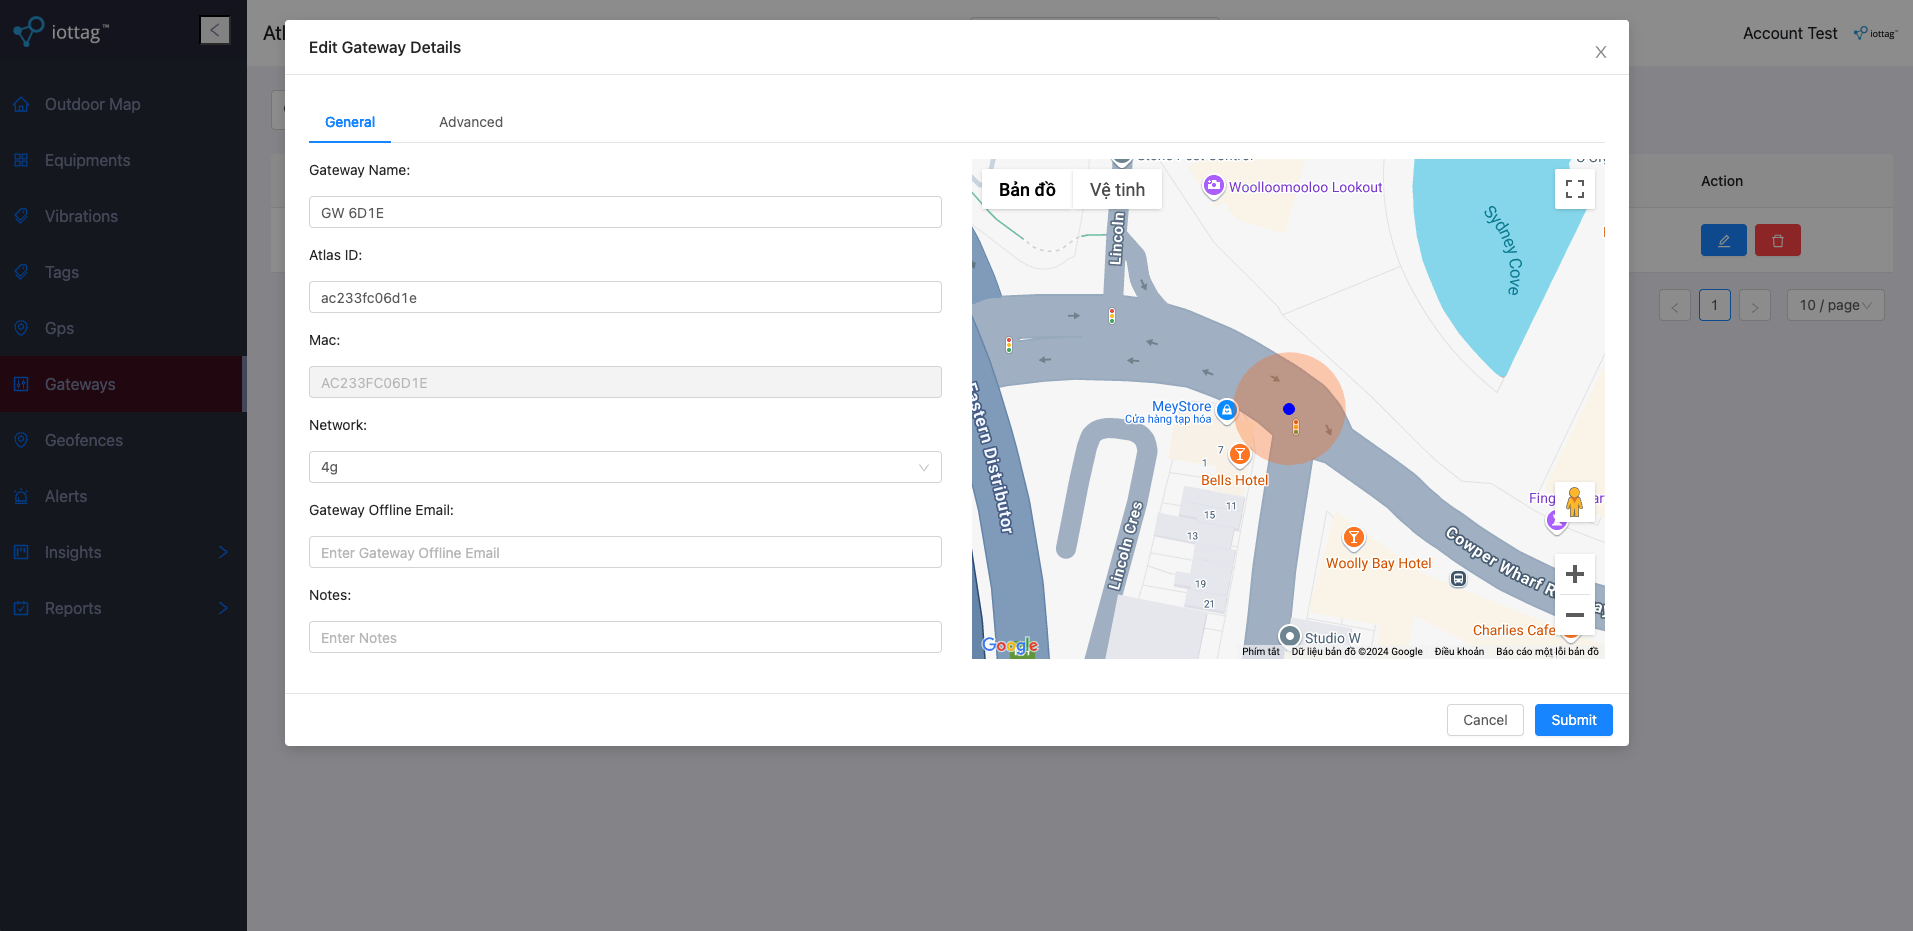
- Update Gateway
- General Tab:
- Update the Gateway Name, Atlas ID.
- Select Network for gateway. There are 3 options: PoE, Wifi, 4G.
- Update Gateway Offline Email to be able to send you email notifications when the gateway is offline.
- You can click new point or drag current to update location of gateway in map.
- Advanced Tab:
- Update the Gateway Status update (on/off) to set the time interval for which the tag will be outranged since the last detection by this gateway.
- Update the Gateway offline Interval to set the time interval the gateway will be offline since the last detection.
- General Tab:
- History Gateway
- Click to History icon on Gateway that you want to view the history.
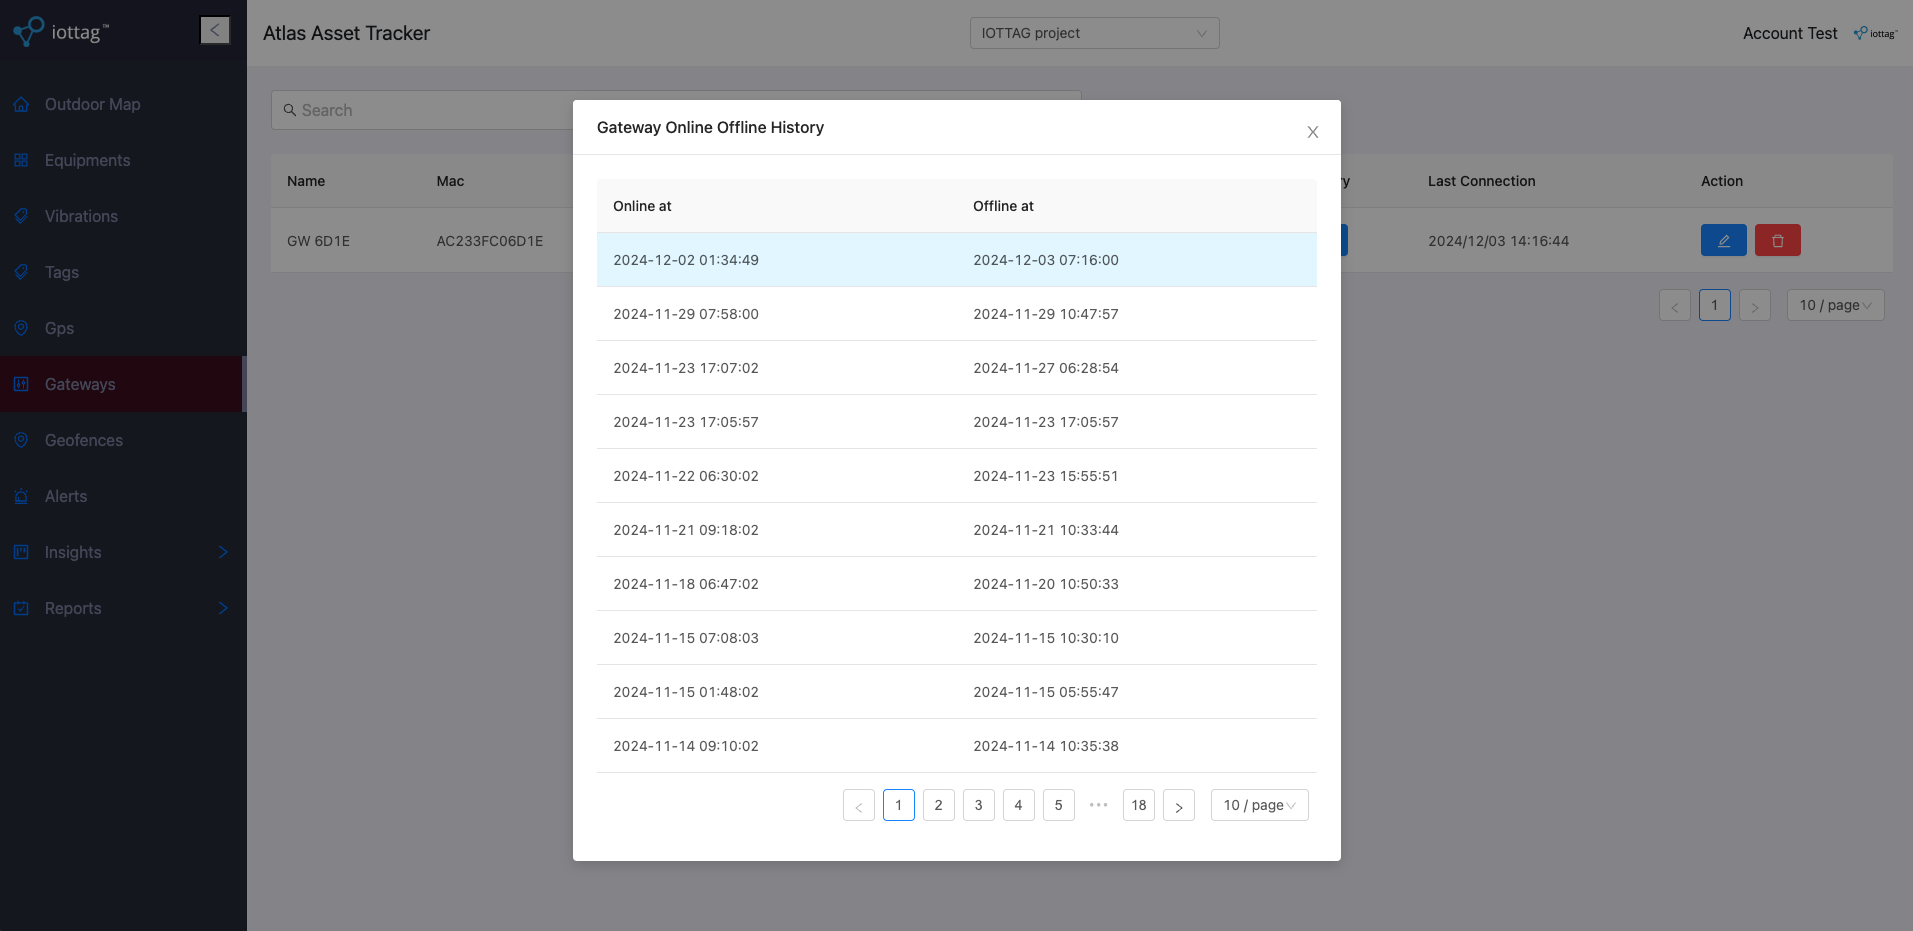
- Click to History icon on Gateway that you want to view the history.
- Table
Alert Management
Main features
- Display alert list
- Create, update and delete alert
Details
- Table
- Columns in table:
- Name: This is name of alert (It will be included in alert template when send to you).
- Trigger Type: It indicates the condition to send you alert. There are two types: Entry Exit
- Notification Type: It shows that when the event send condition is triggered, but which address will be sent.
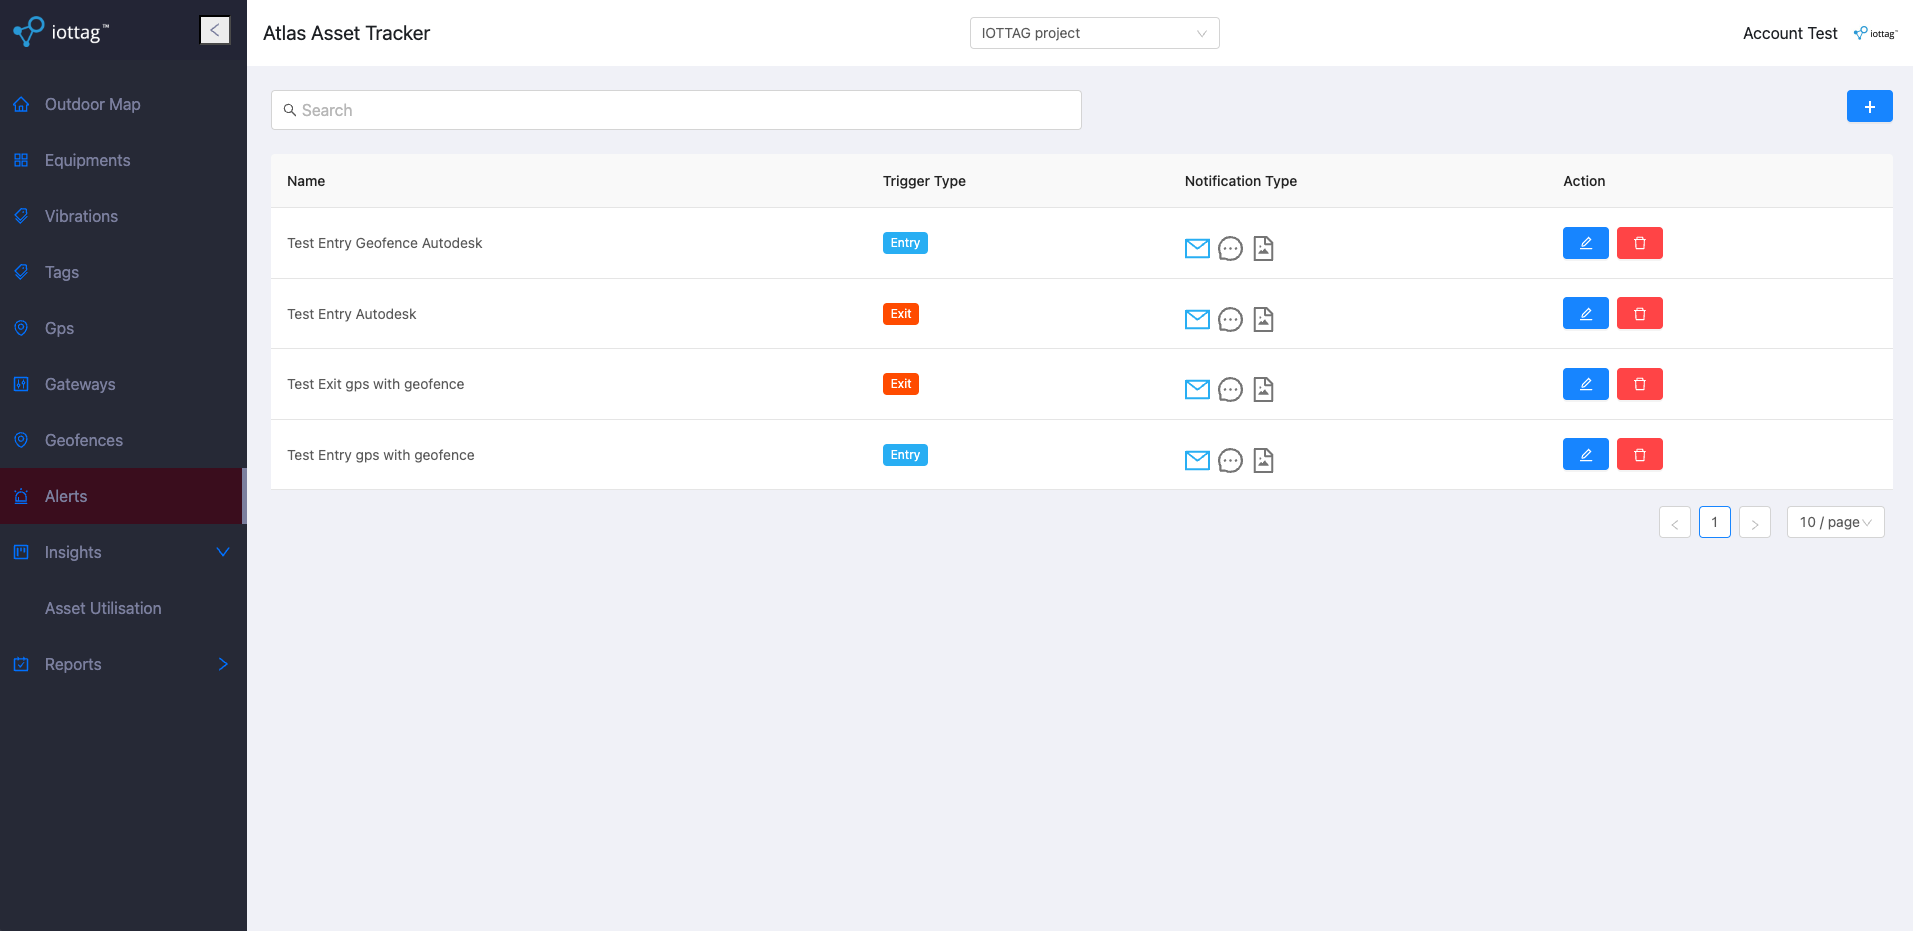
- Columns in table:
- Create, Update Alert
- Enter the Alert Name,
- Select Trigger Type for alert. There are 2 options: Entry, Exit.– Entry condition: When your selected devices come within the coverage area of the selected gateways, an alert will be triggered.– Exit condition: When your selected devices go out of coverage area of the selected gateways, an alert will be triggered.– For example entry alert: Your created alert has devices A, B and trigger conditions based on gateways D, E. If device A comes into coverage area of D or E, the alert will be triggered. Same for device B.
- Select Time Zone to specify the time zone you want to display in the alert template.
- Select Equipments (allow multiple select) to specify the equipment that you want include into this alert.
- You can choose whether the alert is detected by the gateway or geofence by selecting it in the Apply alert for field, after that choose specific gateways or geofences.
- Check on the Email, SMS, MMS checkbox and enter corresponding address if you want to send alerts to these addresses. Especially with MMS you can add an image.

- Table
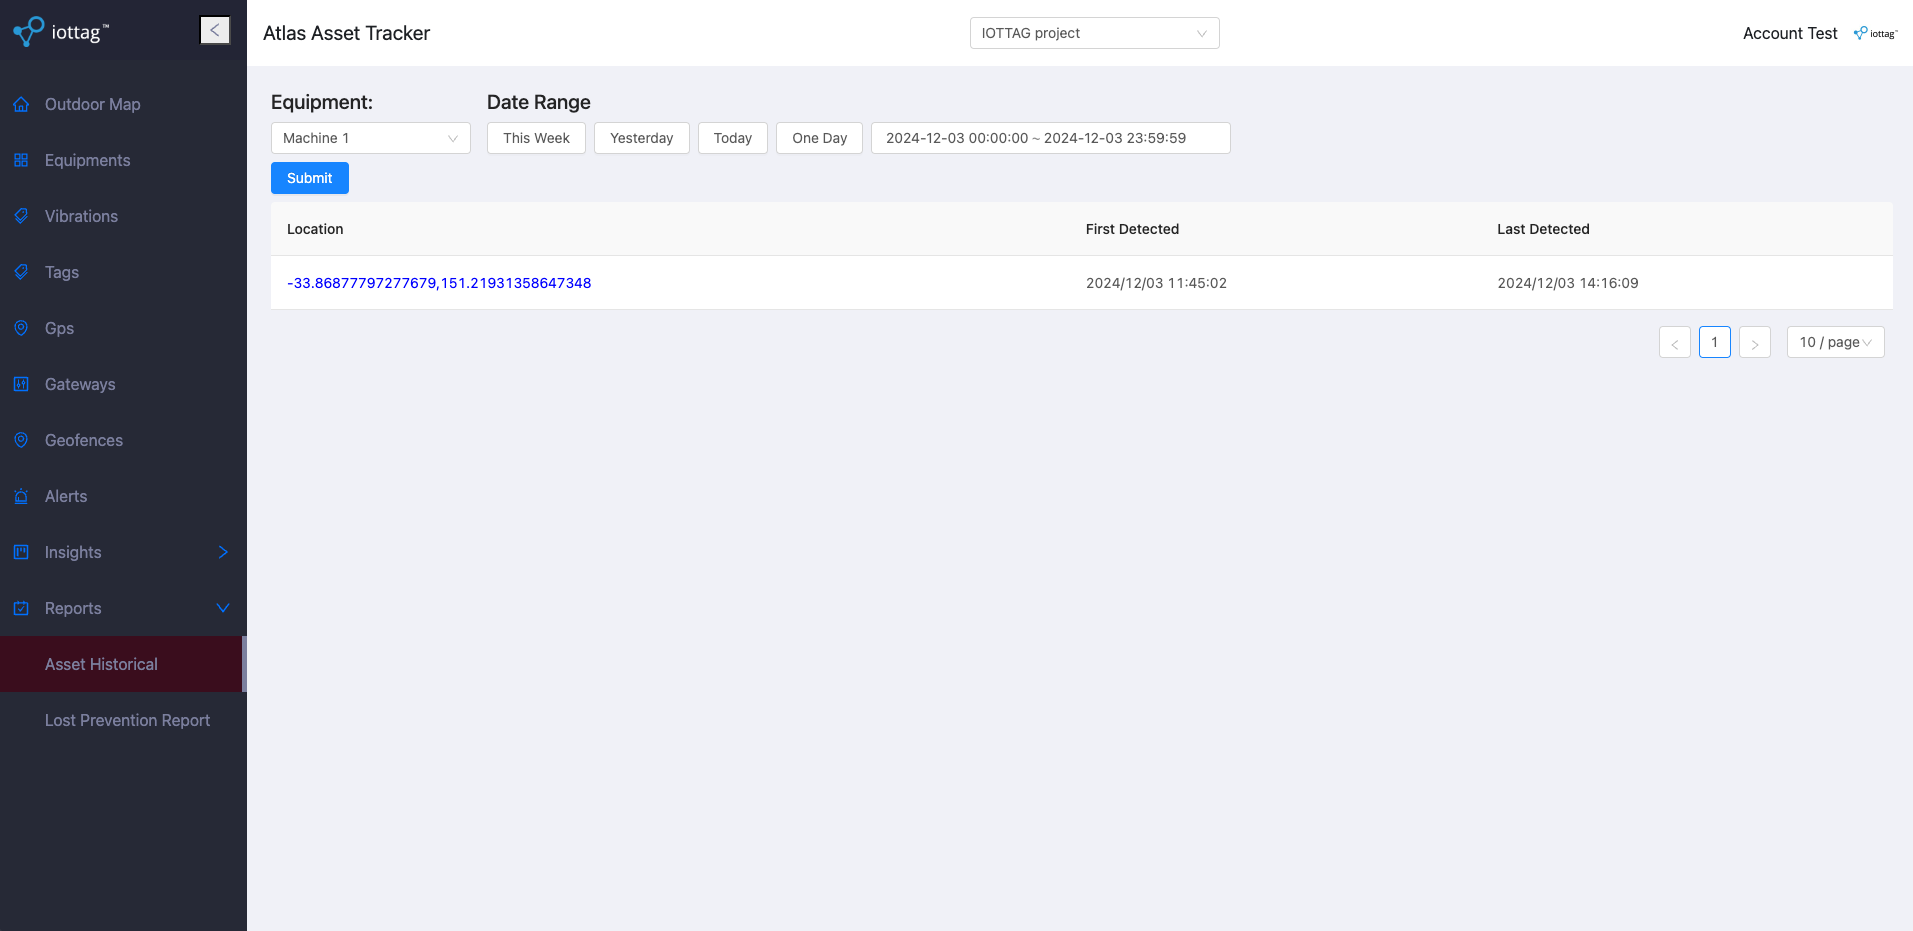
Asset Historical
Main features
- View the history of specific equipment which already attached
Details
- Select Equipment to view history of this equipment
- Select Date Range to view equipment history over a certain period of time, you can choose one of four options or you can completely customize
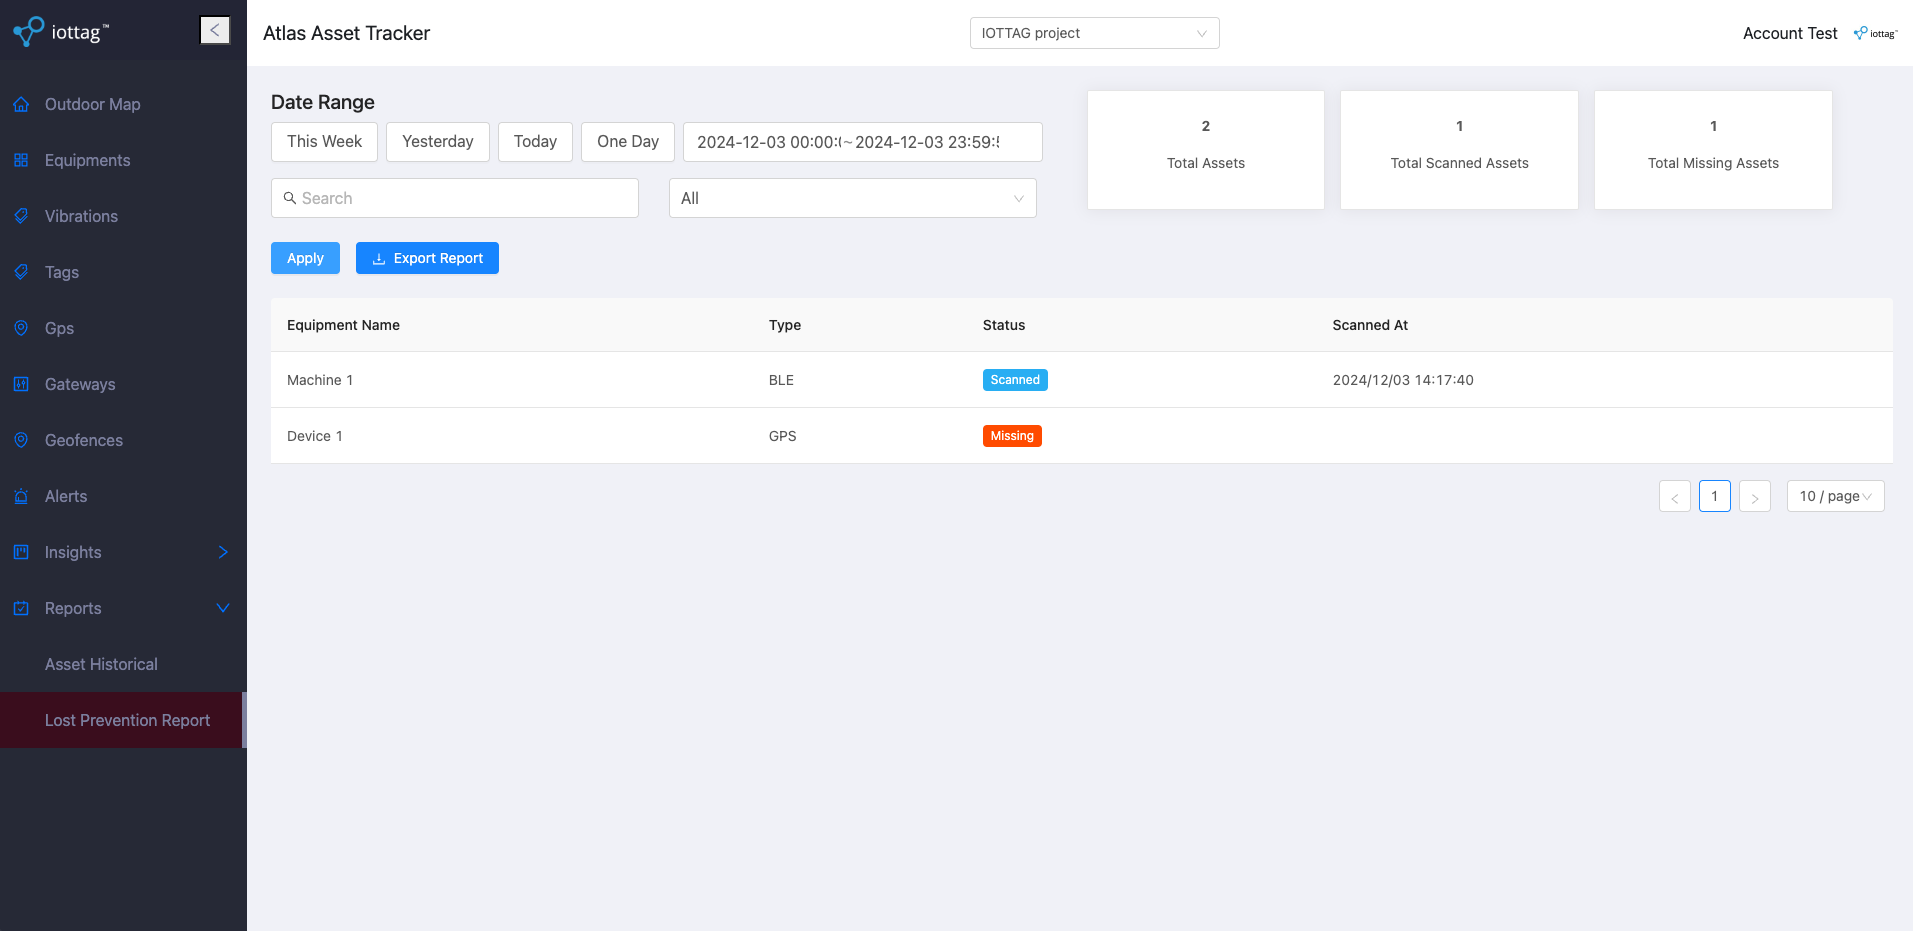
Lost Prevention Report
Main features
- Allow users to check the presence of devices within a specified time range.
- Export the result list to a CSV file for easy record-keeping and analysis.
Details
- Select the Date Range to check the device presence.
- Filter devices by their status (Optional).
- Search for devices by name. (Optional).
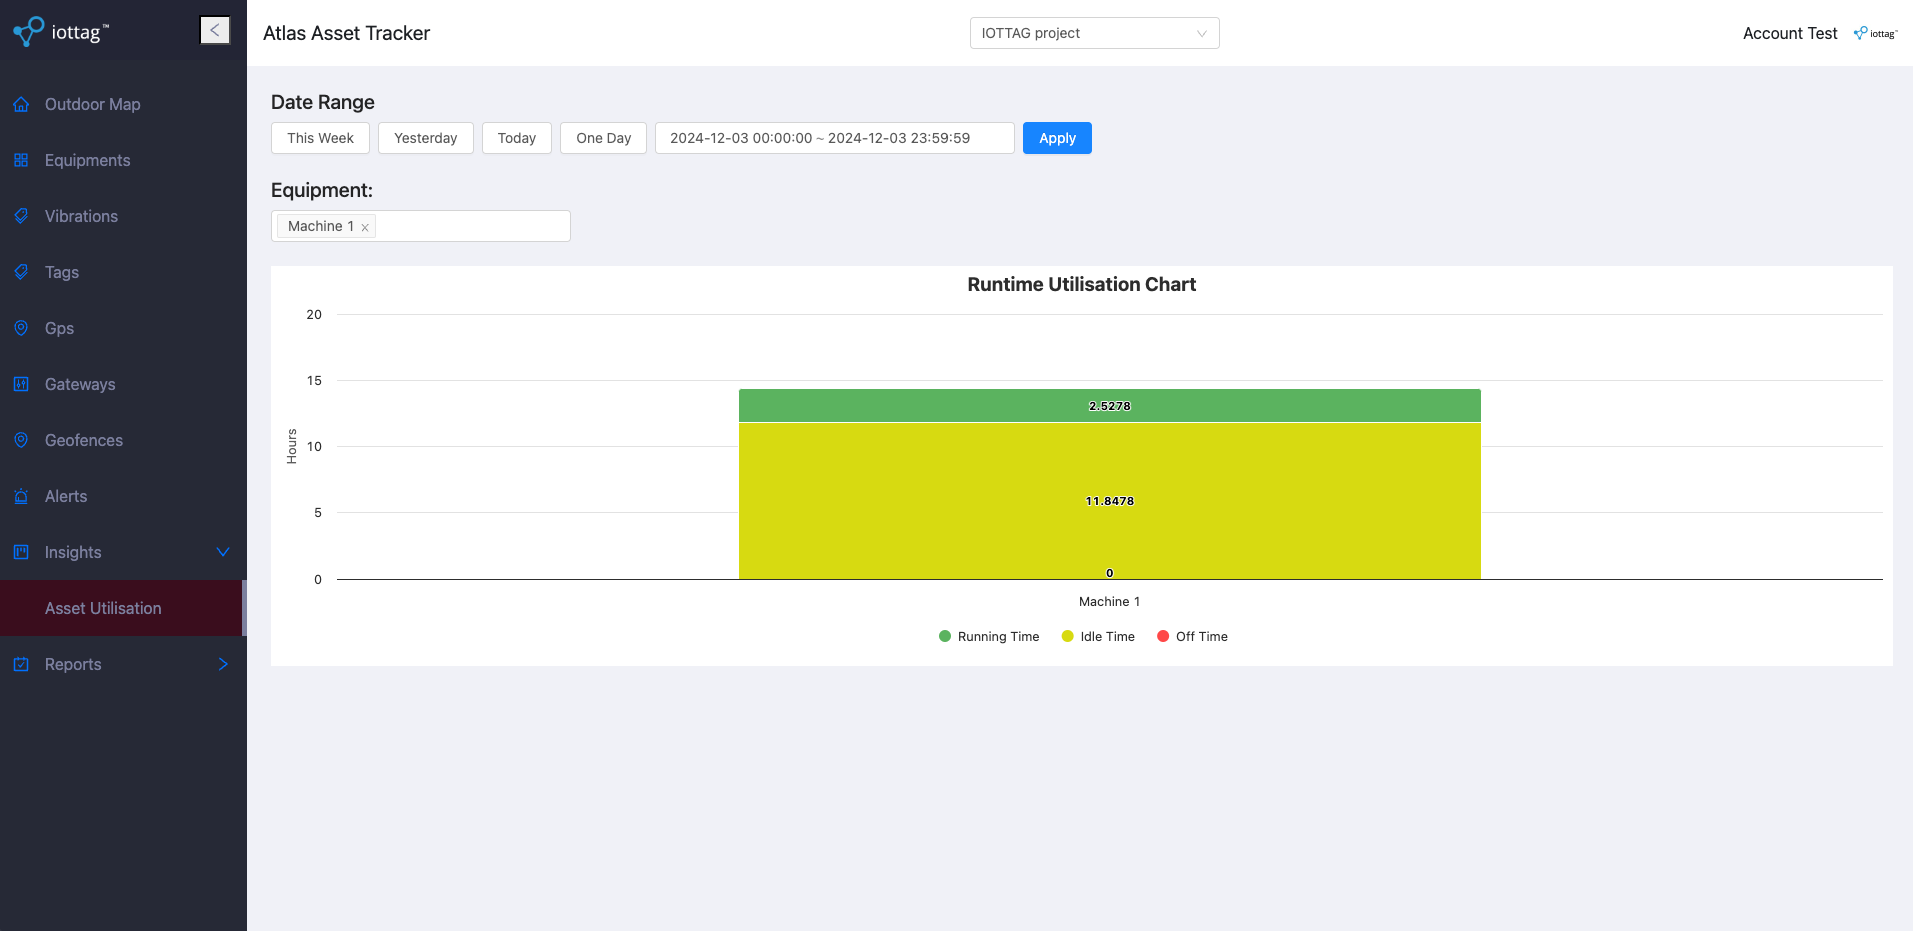
Asset Utilisation
Main features
- Allow users to check the running time, idle time, off time with a specified time range.
Details
- Select the Date Range to check the device presence.
- Select Equipments you want display on chart.
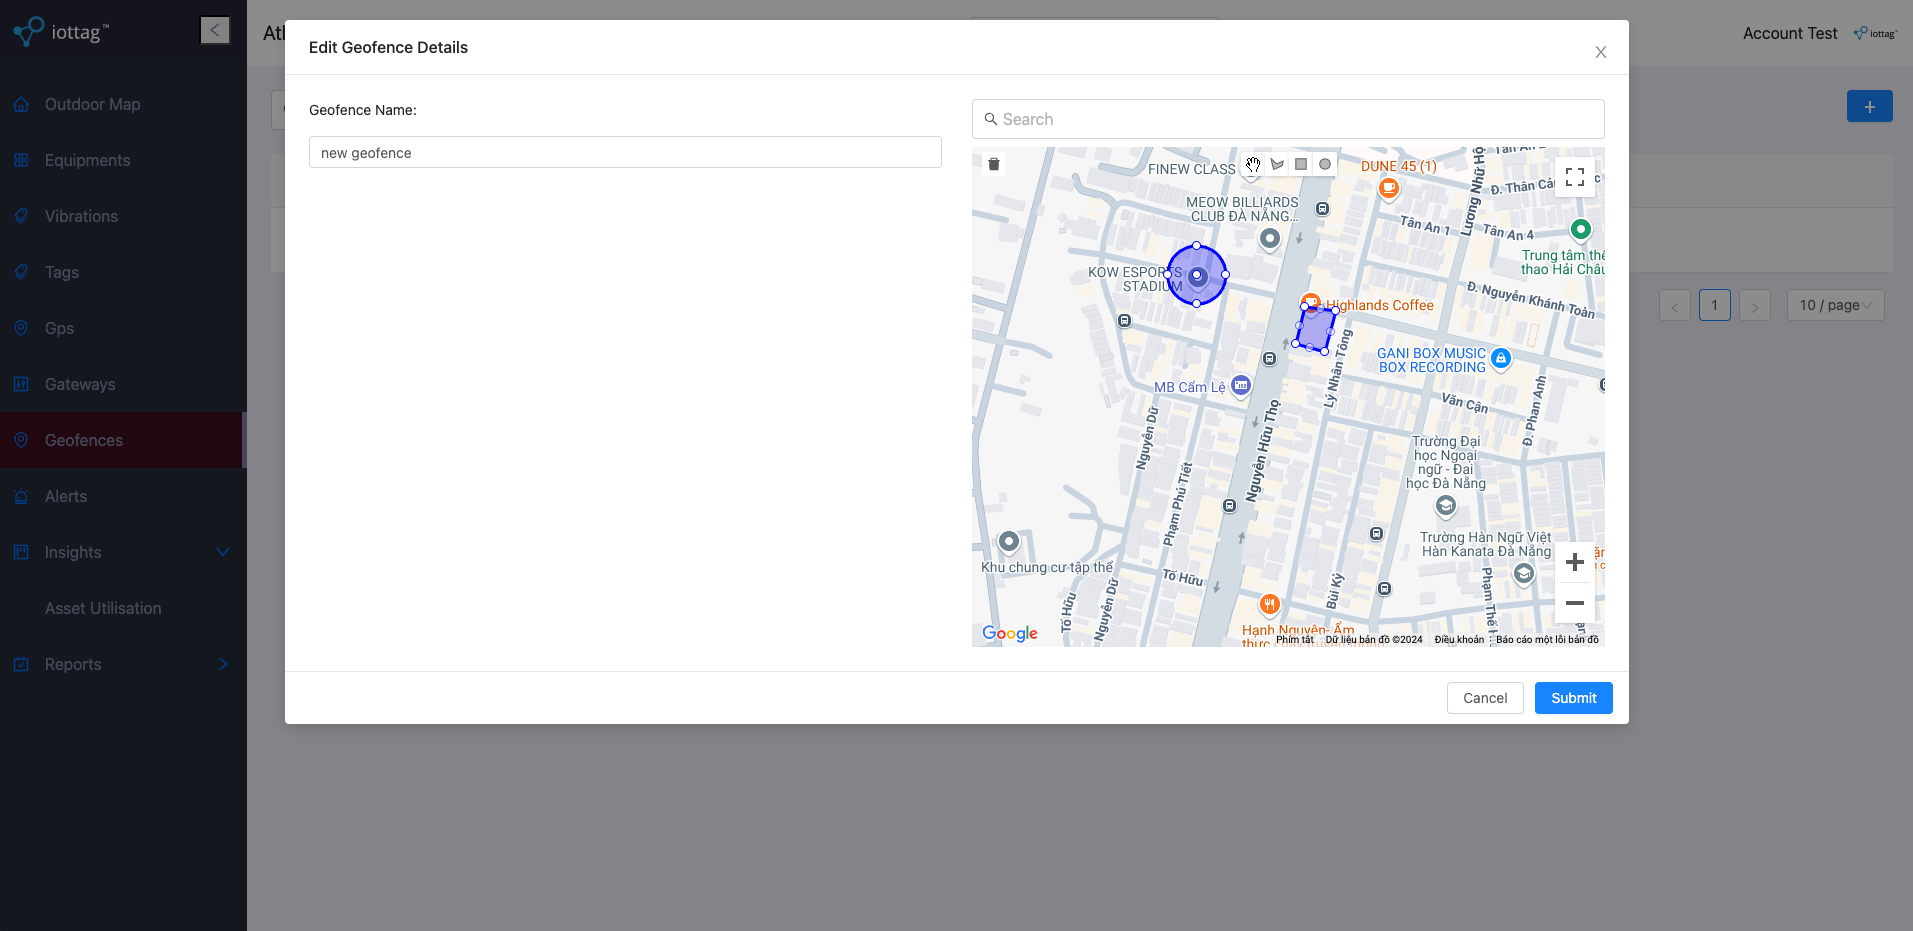
Geofence Management
Main features
- Create the geofences and set the name of them. We can using these geofences to display on Outdoor Map or apply to other function.
Details
- Create, Update Geofence
- Enter the Geofence Name,
- On the map, we can draw the geofence as polygon, rectangle or circle and allow you remove specific shape as well. Beside that we included the search input to help to find the location which you want create geofence more easier.
- Create, Update Geofence
Vibration Management
Main features
- Display tag list.
- Update information of tag.
- View maintenance history of tag.
Details
- Update Tag
- The fields Atlas ID and Mac Address will be disabled and cannot be modified.
- There are checkboxes for Use threshold in X axis, Use threshold in Y axis, and Use threshold in Z axis. When any of these checkboxes is selected, two corresponding inputs (Lower and Upper thresholds) will become enabled:
- For Use threshold in X axis, the inputs Lower threshold X axis and Upper threshold X axis will be enabled.
- Similarly, for Use threshold in Y axis and Use threshold in Z axis, the inputs for their respective lower and upper thresholds will be enabled when checked.
- Number of data points to determine active status: This input defines the number of data records that must exceed the set threshold for the device to be considered “Active”.
- Number of data points to determine inactive status: This input defines the number of data records that must exceed the threshold for the device to be considered “Inactive”.
- Time of maintenance (Hours):
Specifies the number of operational hours before the device requires maintenance in one cycle.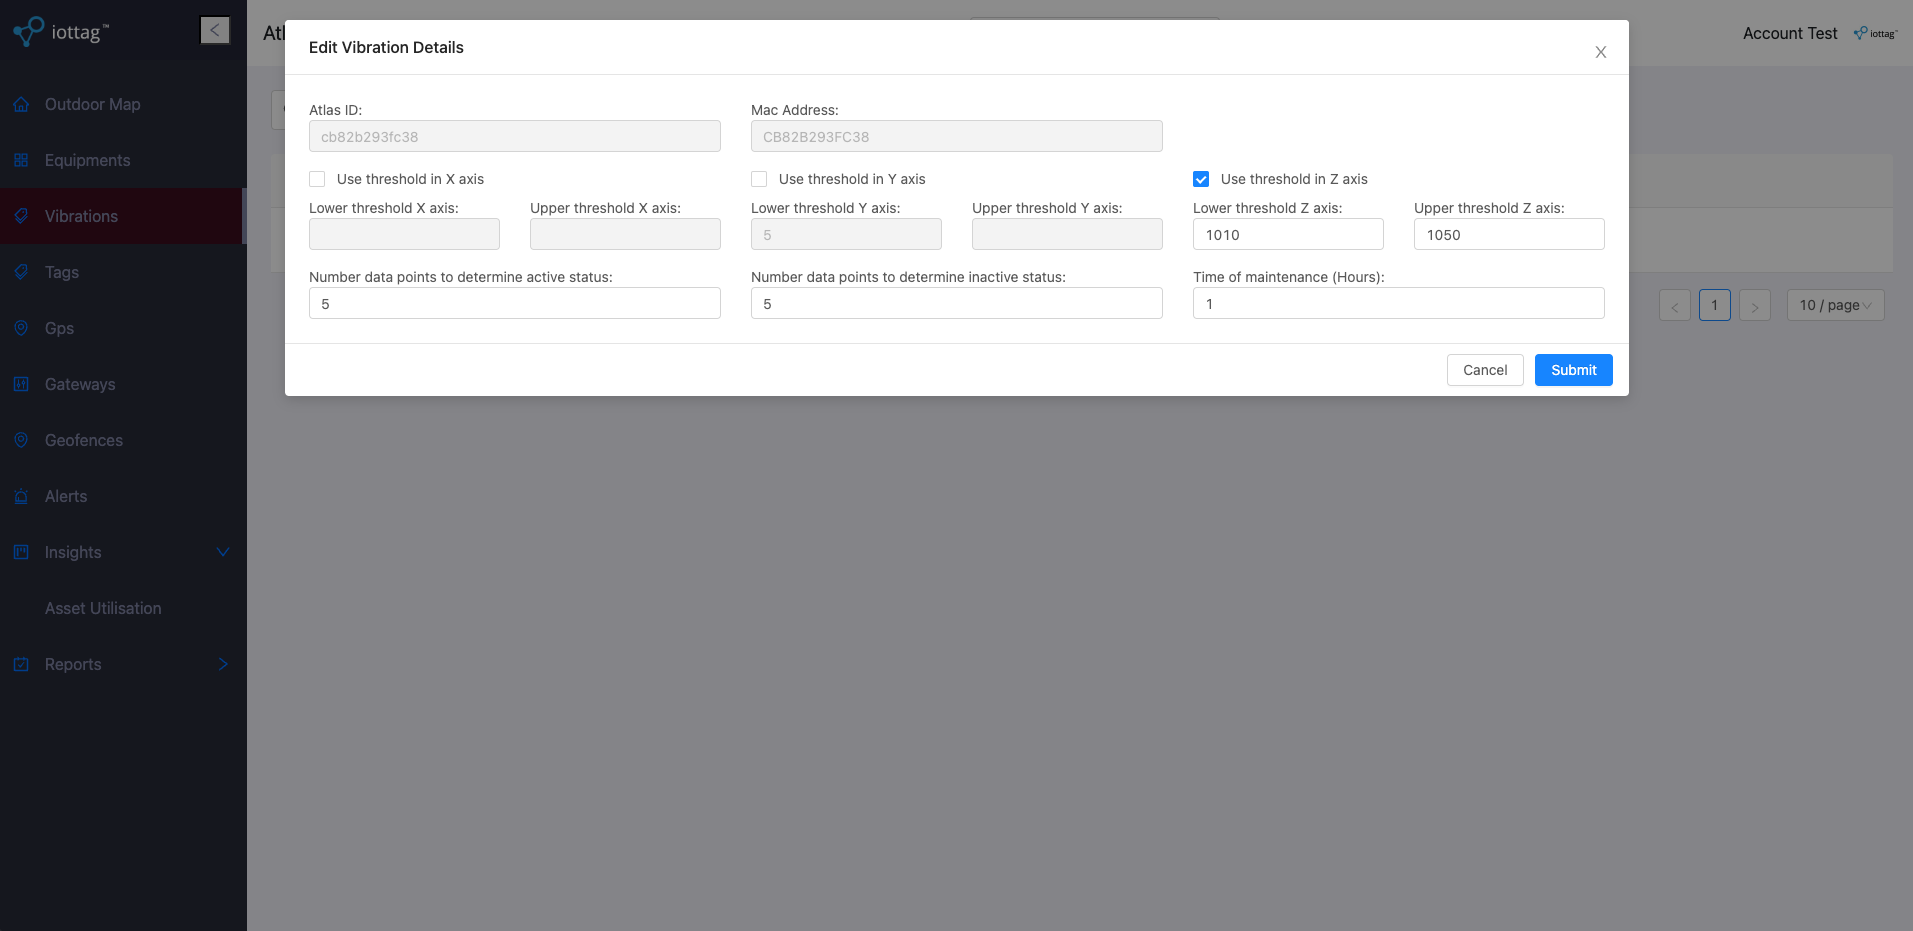
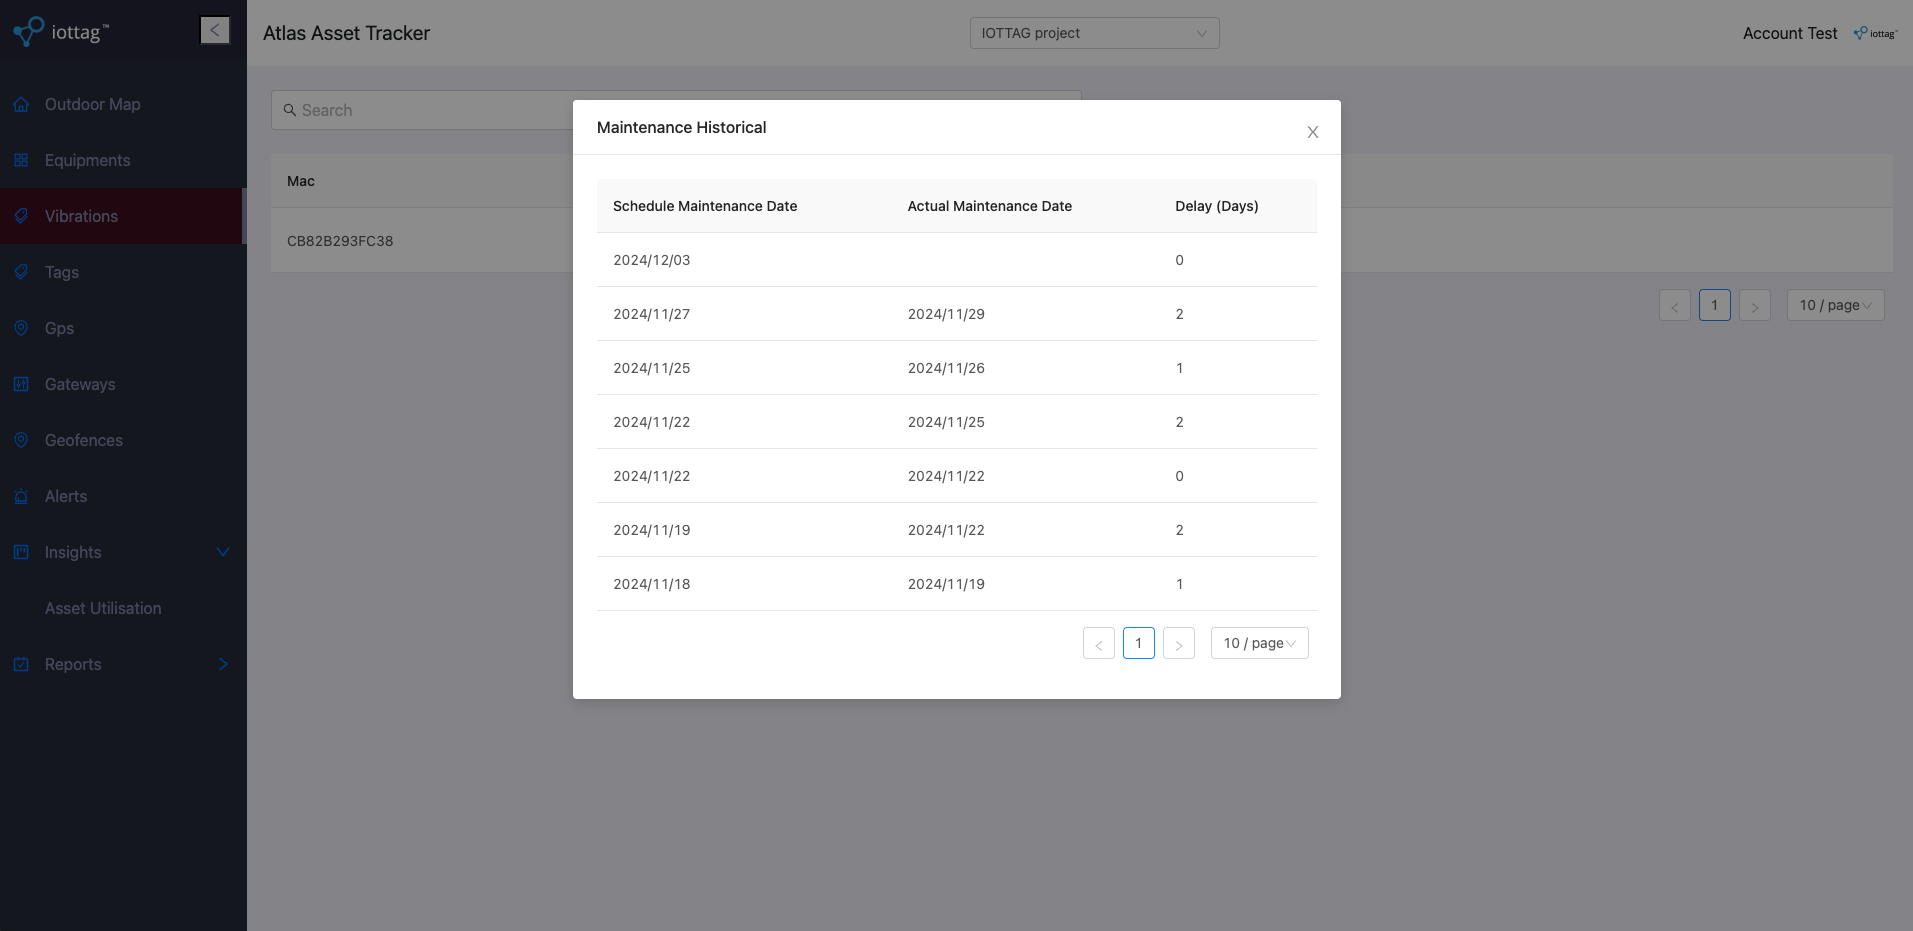
- View maintenance history
- Confirm maintenance
- Enter date and time to confirm the datetime maintenance is completed.
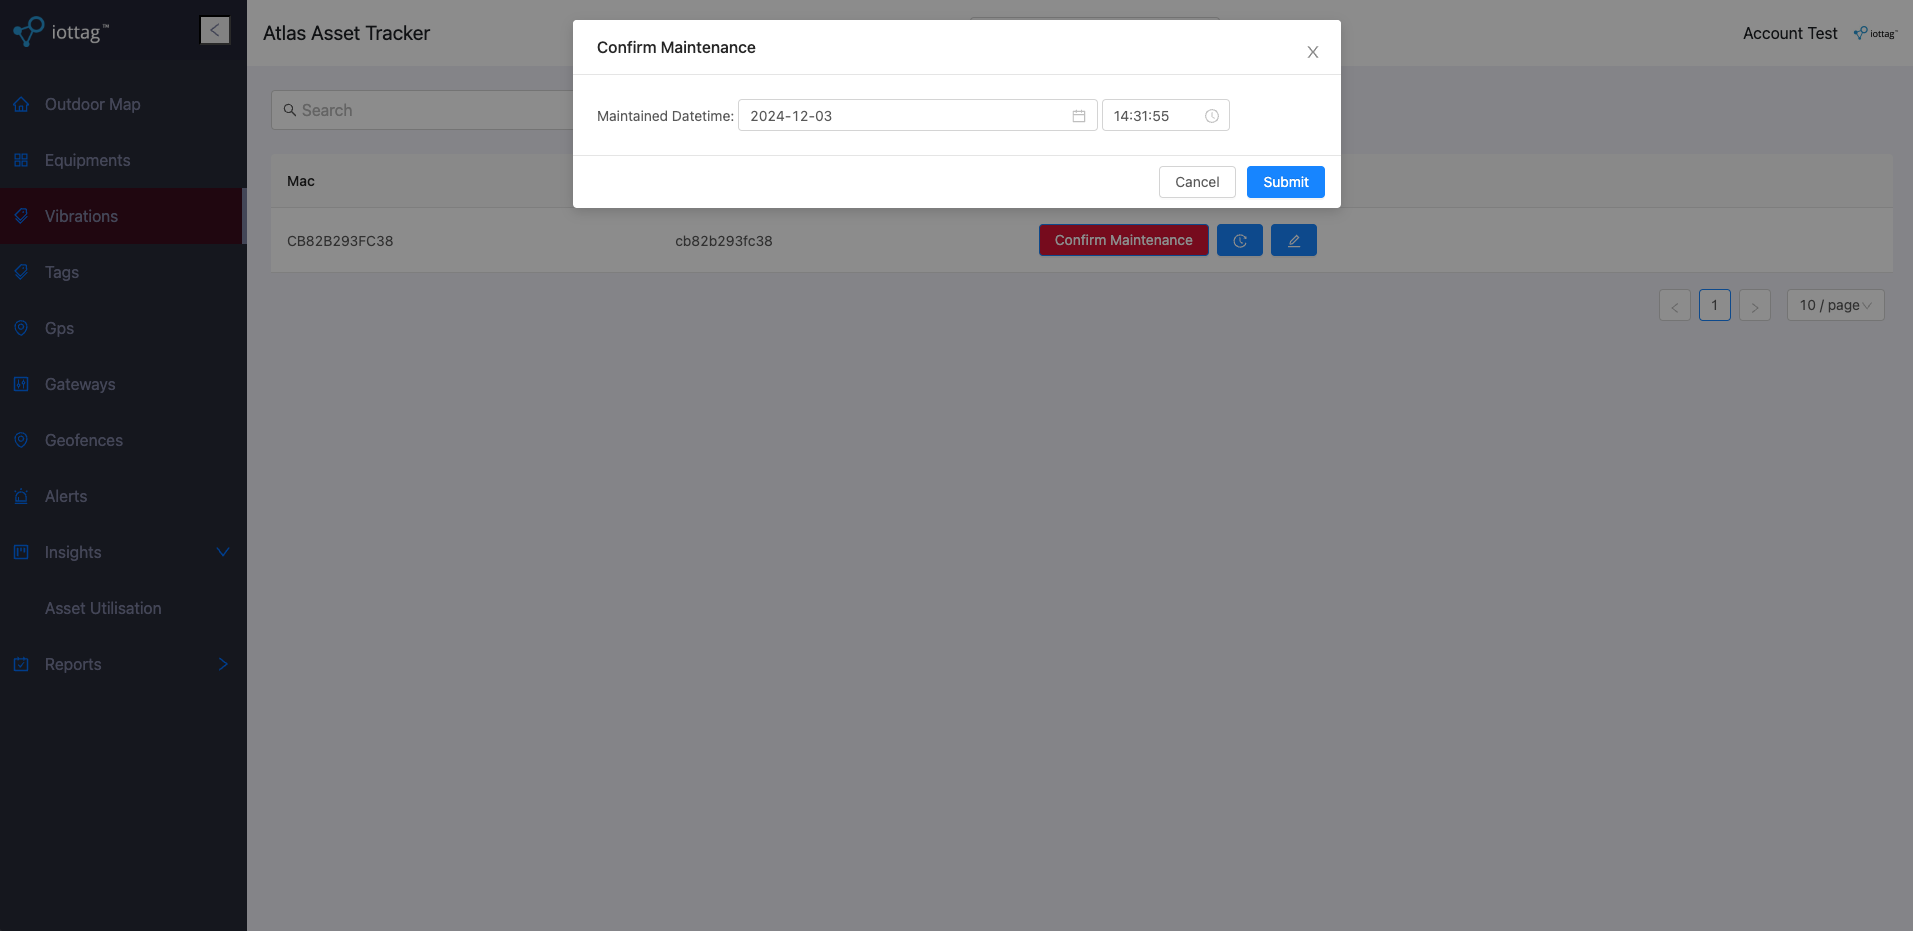
- Enter date and time to confirm the datetime maintenance is completed.
- Update Tag
What our customers say
Discover the power of real-time asset tracking, and start making data driven decisions and increase profitability year on year. Discover the power of real-time asset tracking, and start making data driven decisions and increase profitability year on year.
Staff Director
Discover the power of real-time asset tracking, and start making data driven decisions and increase profitability year on year. Discover the power of real-time asset tracking, and start making data driven decisions and increase profitability year on year.
Staff Director
